How to Choose the Best Club Management Software?
Is Your Administrative Workload Holding Back Your After-School Club’s Growth?...

Managing student data efficiently is a crucial aspect of running an educational club or program. Manual data entry is time-consuming, prone to errors, and inefficient, especially for institutions handling large numbers of students. Exoclass simplifies this process with its automated student enrollment feature, allowing administrators to import students into Exoclass in just a few simple steps.
We are introducing a new Exoclass student import feature that simplifies adding students directly into the system. This innovation makes handling administrative tasks even easier, giving you more time for quality education. This guide provides a step-by-step overview of how to use Exoclass student import, ensuring a smooth and hassle-free onboarding experience for students and their parents.
To import students into the system, you will follow 4 steps:
1. Downloading the import file
2. Filling in the information
3. Choosing a payment interval
4. Uploading the file into the system
5. Let’s discuss each of these steps in more detail.
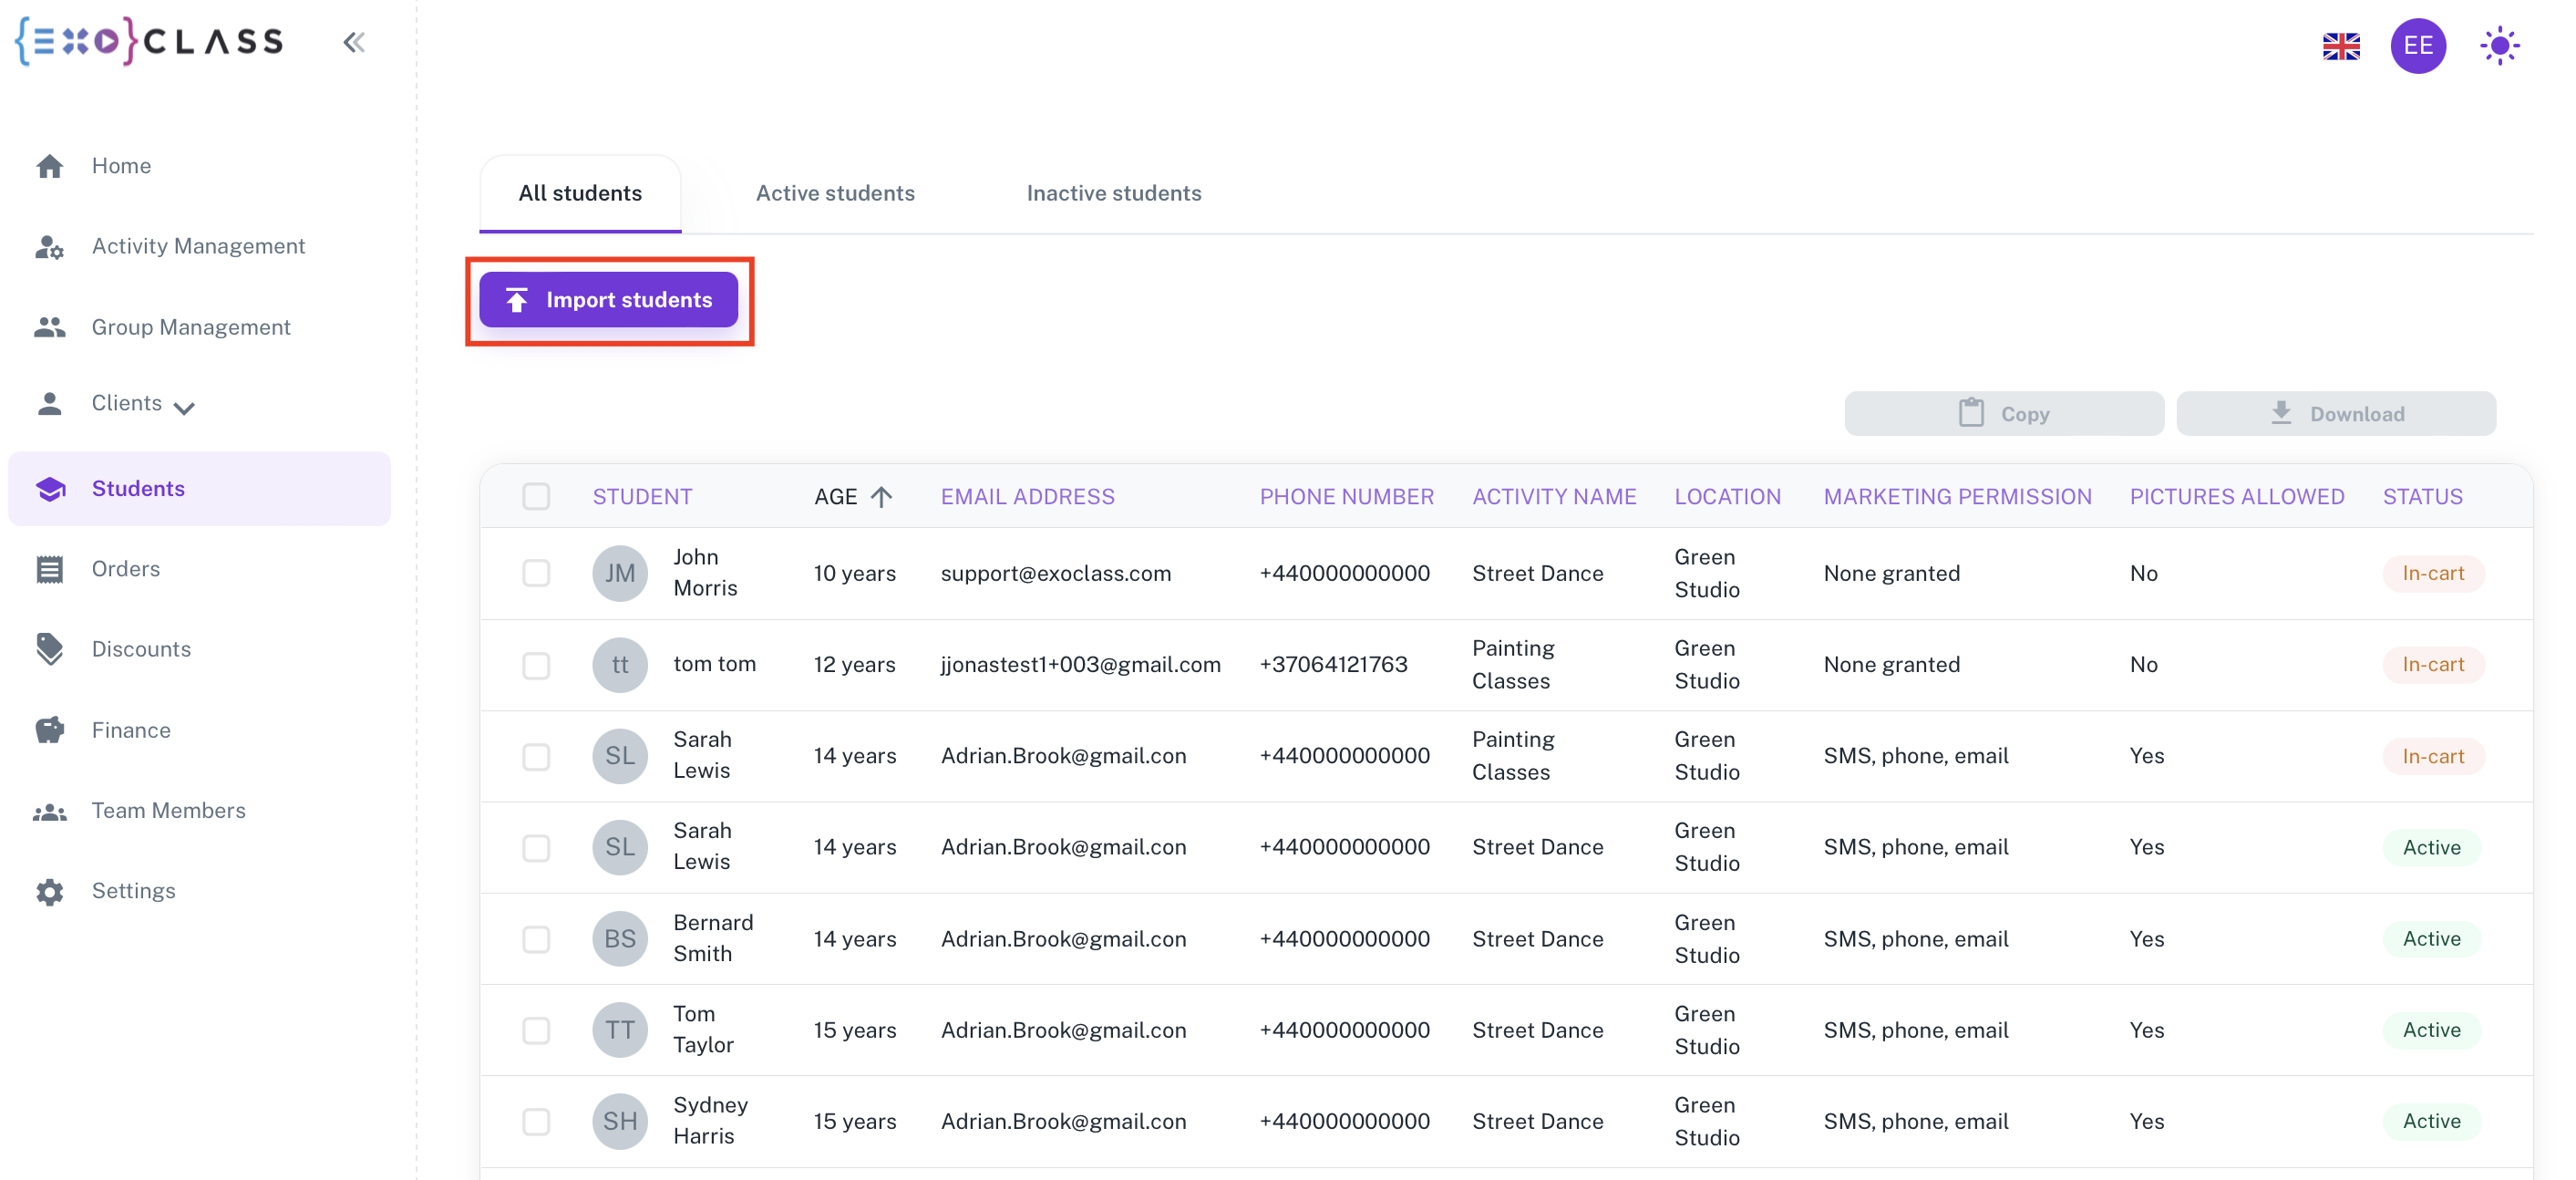
In the “Students” section, you will now find a “Import Students” button.

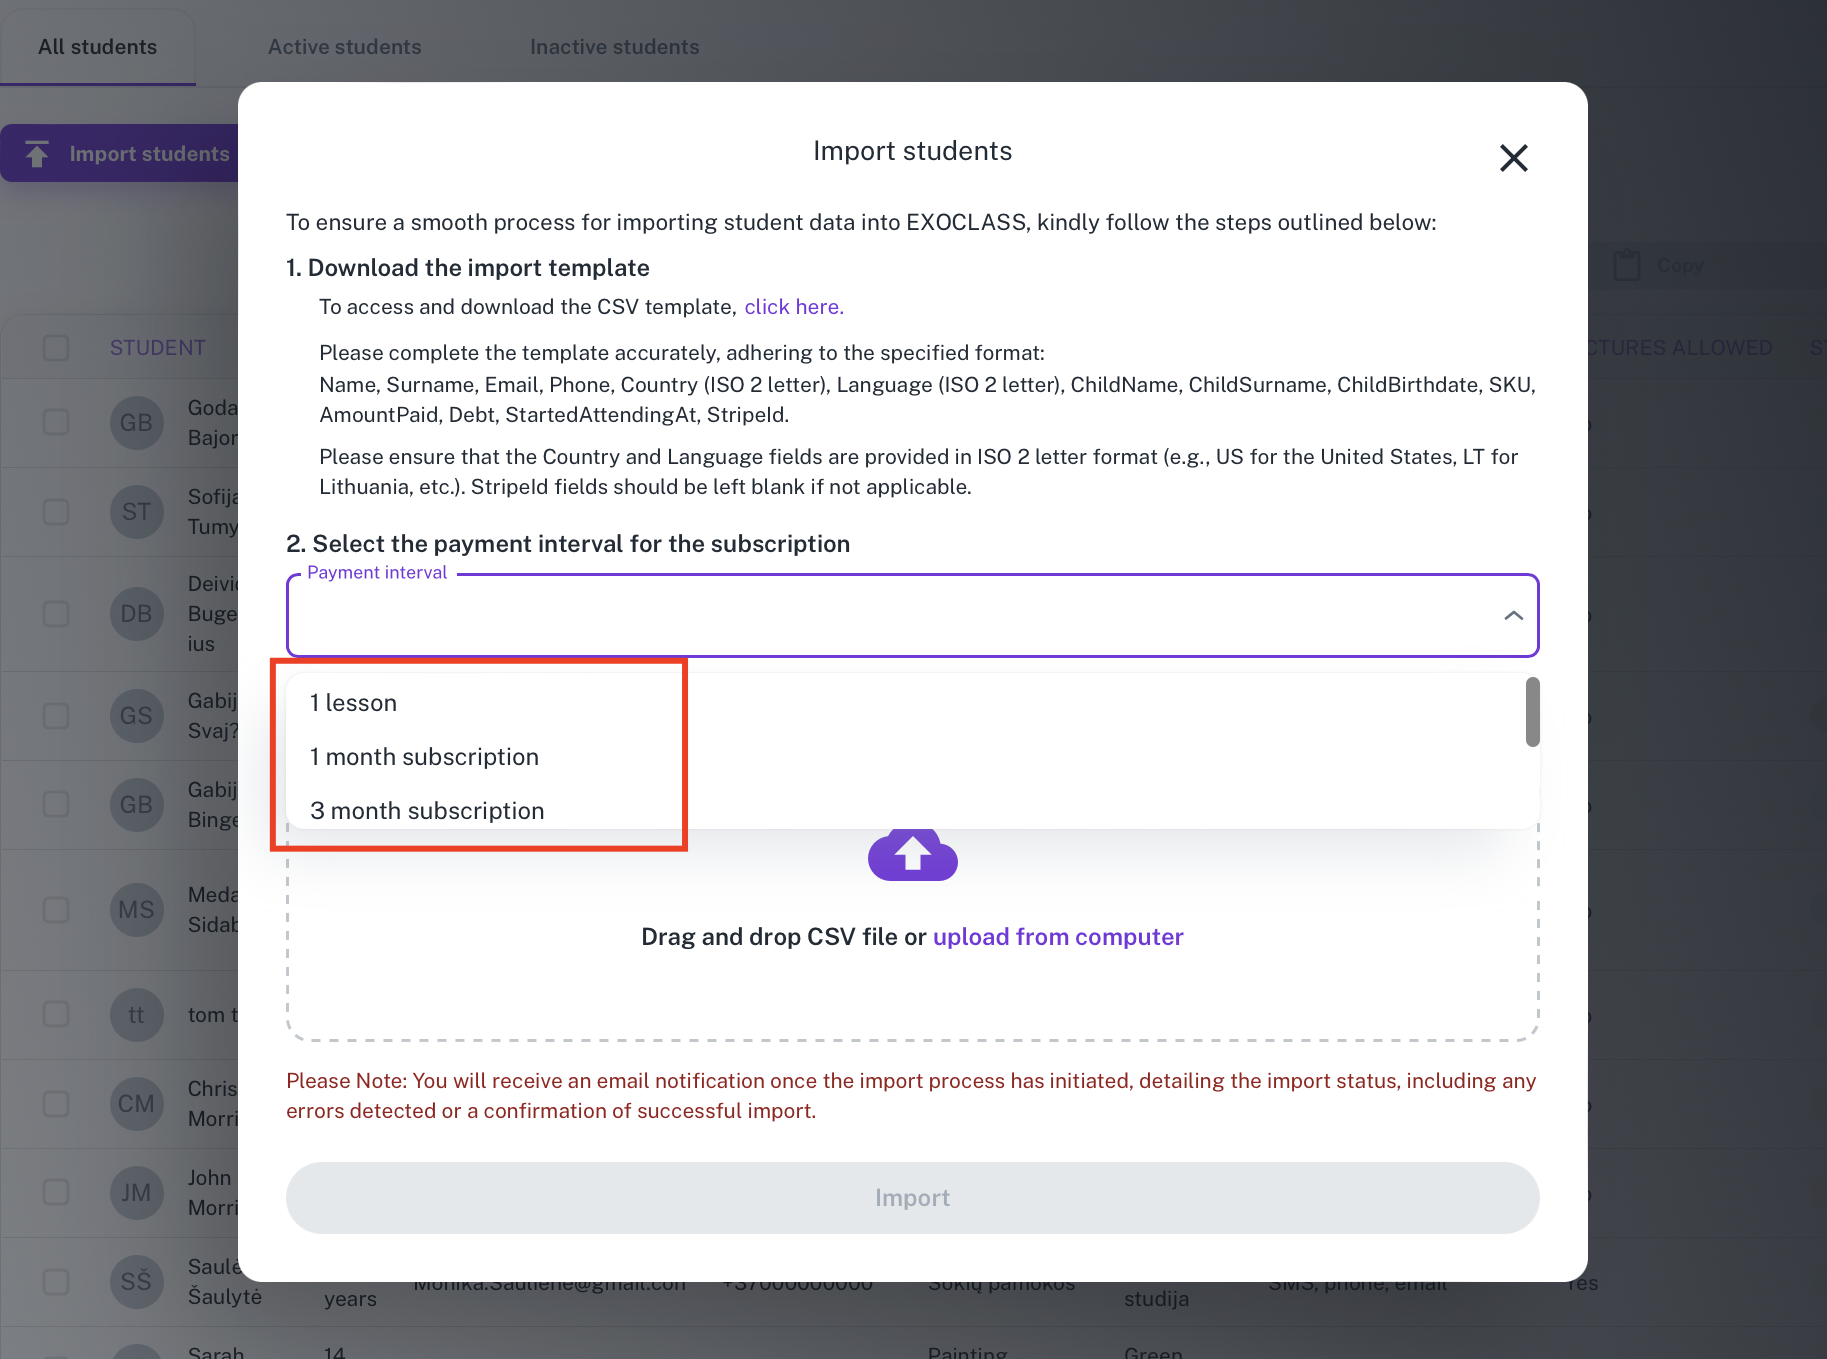
Clicking this button will open a table with essential information for importing, including a link to download the import template.

By clicking on this link, you can download a CSV file into which you can enter the information you wish to import.
In the downloaded file, you will need to fill in information about parents, students, groups, and fees. Ensuring accurate data entry at this stage is crucial for a successful automated student enrollment process.

The file will include fields for entering information such as:
1. Name – the parent’s first name.
2. Surname – the parent’s last name.
3. Email – the parent’s email address.
4. Phone – the parent’s phone number. It must be entered with the country prefix 353/44/1.
5. Country – IE/GB/US (capital letters)
6. Language – en (lower case)
7. ChildName – the student’s first name.
8. ChildSurname – the student’s last name.
9. ChildBirthdate – the student’s date of birth, separated by dashes (e.g., 2016-11-22). If the date is unknown, you can enter an approximate one, and later adjust it in the system when known.
10. SKU – the group’s short code.
11. Debt – enter 0 if the student has no additional debts. Entering an amount will create a debit in the balance. (note: the system will automatically add the club’s price based on the group information)
12. Credit – enter 0 if the student has no additional credits. Entering an amount will create a credit in the balance. (note: the system will automatically add the club’s price based on the group information)
13. StartedAttendingAt – the student’s start date of attending the club, separated by dashes (e.g., 2024-01-01).
14. StripeId – if you are using the Stripe payment system, enter the client’s Stripe code here. If not using Stripe – leave this field empty.
15. CouponCode – enter the discount code if you wish to apply it to the student. Otherwise, leave the field empty.
Once you have filled in this information, save the file.
Before uploading the filled file into the system, choose the payment interval for these students to attend the groups specified in the file. You can choose from all the payment intervals available in your account.

Note: If the students to be imported have different payment intervals, separate these students into different files and import them separately.
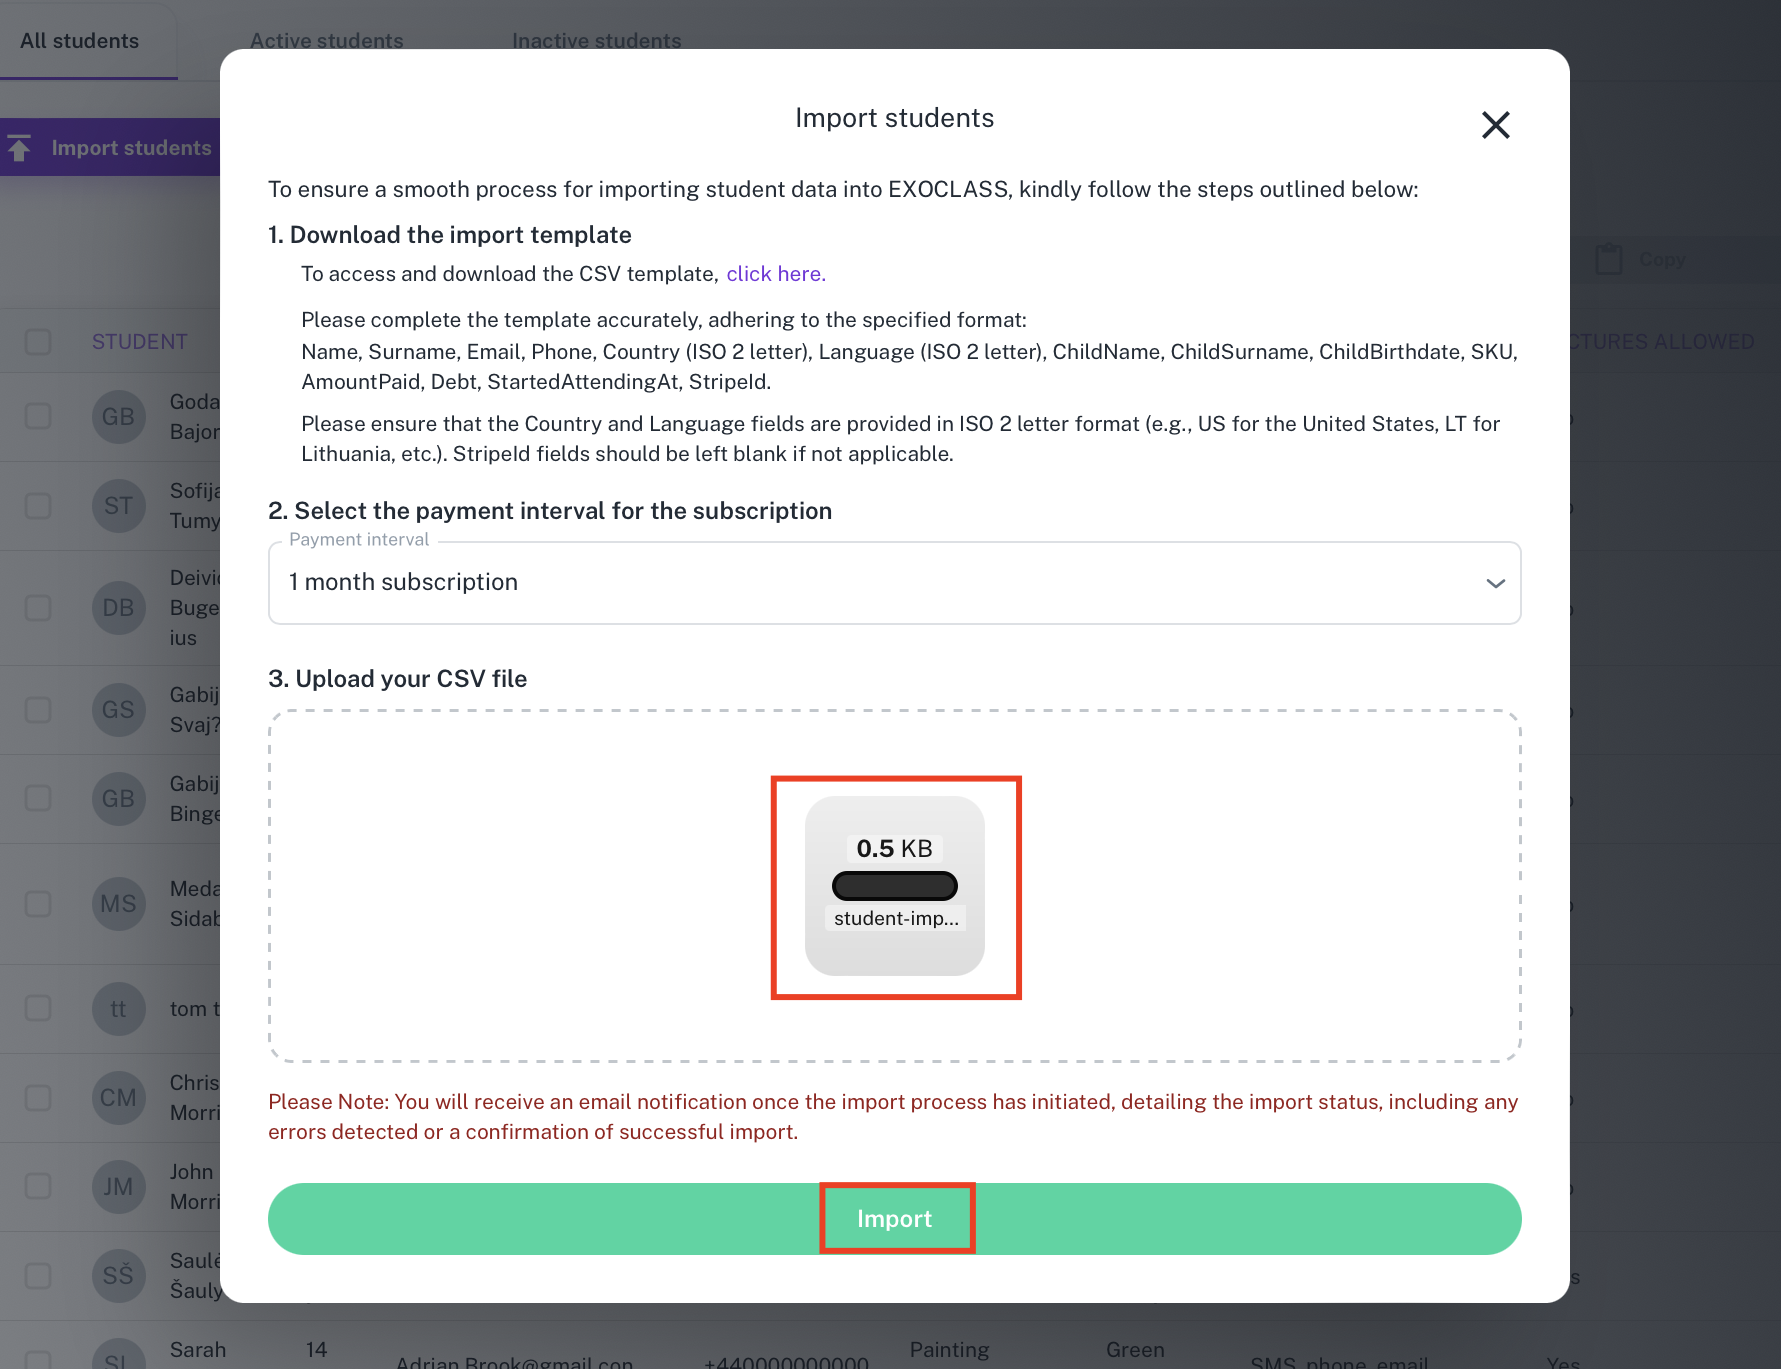
Once the payment interval is chosen, drag and drop the filled CSV file into the designated area.

Once all the previously mentioned steps have been completed, simply press the “Import” button.
The import process may take a few minutes, after which the students will gradually appear in their respective groups.
There may be instances where the import is unsuccessful, and the system does not import the students. Here are a few cases and explanations on what to do.
1. Row x empty. This means that you did not fill in data in a particular row. Check the row indicated by the system and ensure that all required rows are filled.
2. Invalid header. This means that there might be additional symbols in your file’s titles that were not anticipated. Check if the titles in your file match the original import file’s titles.
By following these steps, you will be able to efficiently import students into Exoclass, allowing the system to do the rest of the work. This innovation not only saves time but also increases the accuracy of student records, ensuring smoother operation of your educational programs. Try it out and experience the convenience and efficiency that Exoclass provides in handling administrative processes!
Efficient student enrollment is critical for educational programs, and our education management software provides a seamless solution through its automated student enrollment feature. By allowing bulk student data uploads, automated payment integration, and error validation, Exoclass helps educators save time, reduce errors, and streamline administration.
This feature is particularly beneficial for:
✅ Dance, sports, music, and tutoring programs that frequently enroll students.
✅ Educational institutions handling large student databases.
✅ Administrators who want to reduce manual work and improve accuracy.
✅ Organizations looking for seamless payment integration.
With automated student enrollment, Exoclass eliminates repetitive tasks and allows educators to focus on what matters—providing quality education.

1. Can I import students in bulk?
Yes! The automated student enrollment feature in Exoclass allows you to upload hundreds of students simultaneously using a structured CSV file. This eliminates manual data entry, reduces errors, and speeds up the registration process. For best results, ensure that all required fields are filled correctly before uploading to prevent import errors.
2. What happens if I upload the wrong data?
If an import contains incorrect information, Exoclass provides real-time validation, helping you identify and correct errors before finalizing the process. If an entry needs to be modified after import, you can either manually adjust the student’s details in the education management software or delete and re-upload the corrected file. Using the built-in error handling system, you can easily detect issues like duplicate emails, invalid formatting, or missing fields.
3. Is Exoclass compatible with external payment systems?
Yes, Exoclass integrates seamlessly with Stripe, allowing you to automate invoicing and tuition payments as part of the automated student enrollment process. Each student’s account can be linked to a Stripe ID, ensuring secure transactions and automatic subscription renewals. Additionally, Exoclass supports manual payment tracking, allowing you to register offline payments like cash or bank transfers.
4. Can I update student records after import?
Yes! Once students are imported, you can manually update their details through the student profile page in Exoclass. This includes modifying their personal information, assigned groups, payment plans, or attendance records. For batch updates, exporting the student list, making modifications in a spreadsheet, and re-importing it is the most efficient approach.
5. Can I track the enrollment history of imported students?
Yes, Exoclass provides a detailed student enrollment history, allowing you to track past group assignments, subscription changes, and tuition payments. This is particularly useful for organizations that need to manage long-term student records and analyze trends in student retention. Additionally, administrators can export reports for performance evaluation or auditing purposes.
