Solo Founders: When You Are the Entire After-School Club
Every after-school club begins the same way: with one person...

Exoclass is a comprehensive educational activity management system meticulously designed to streamline the operations of educational organizations. It takes care of essential tasks such as customer data management, financial administration, invoicing, and reminders, leaving you with more time to focus on what truly matters – delivering exceptional educational experiences. It all begins with the simple yet vital step to create a group in Exoclass. In this Exoclass user guide, we will walk you through the process step by step.
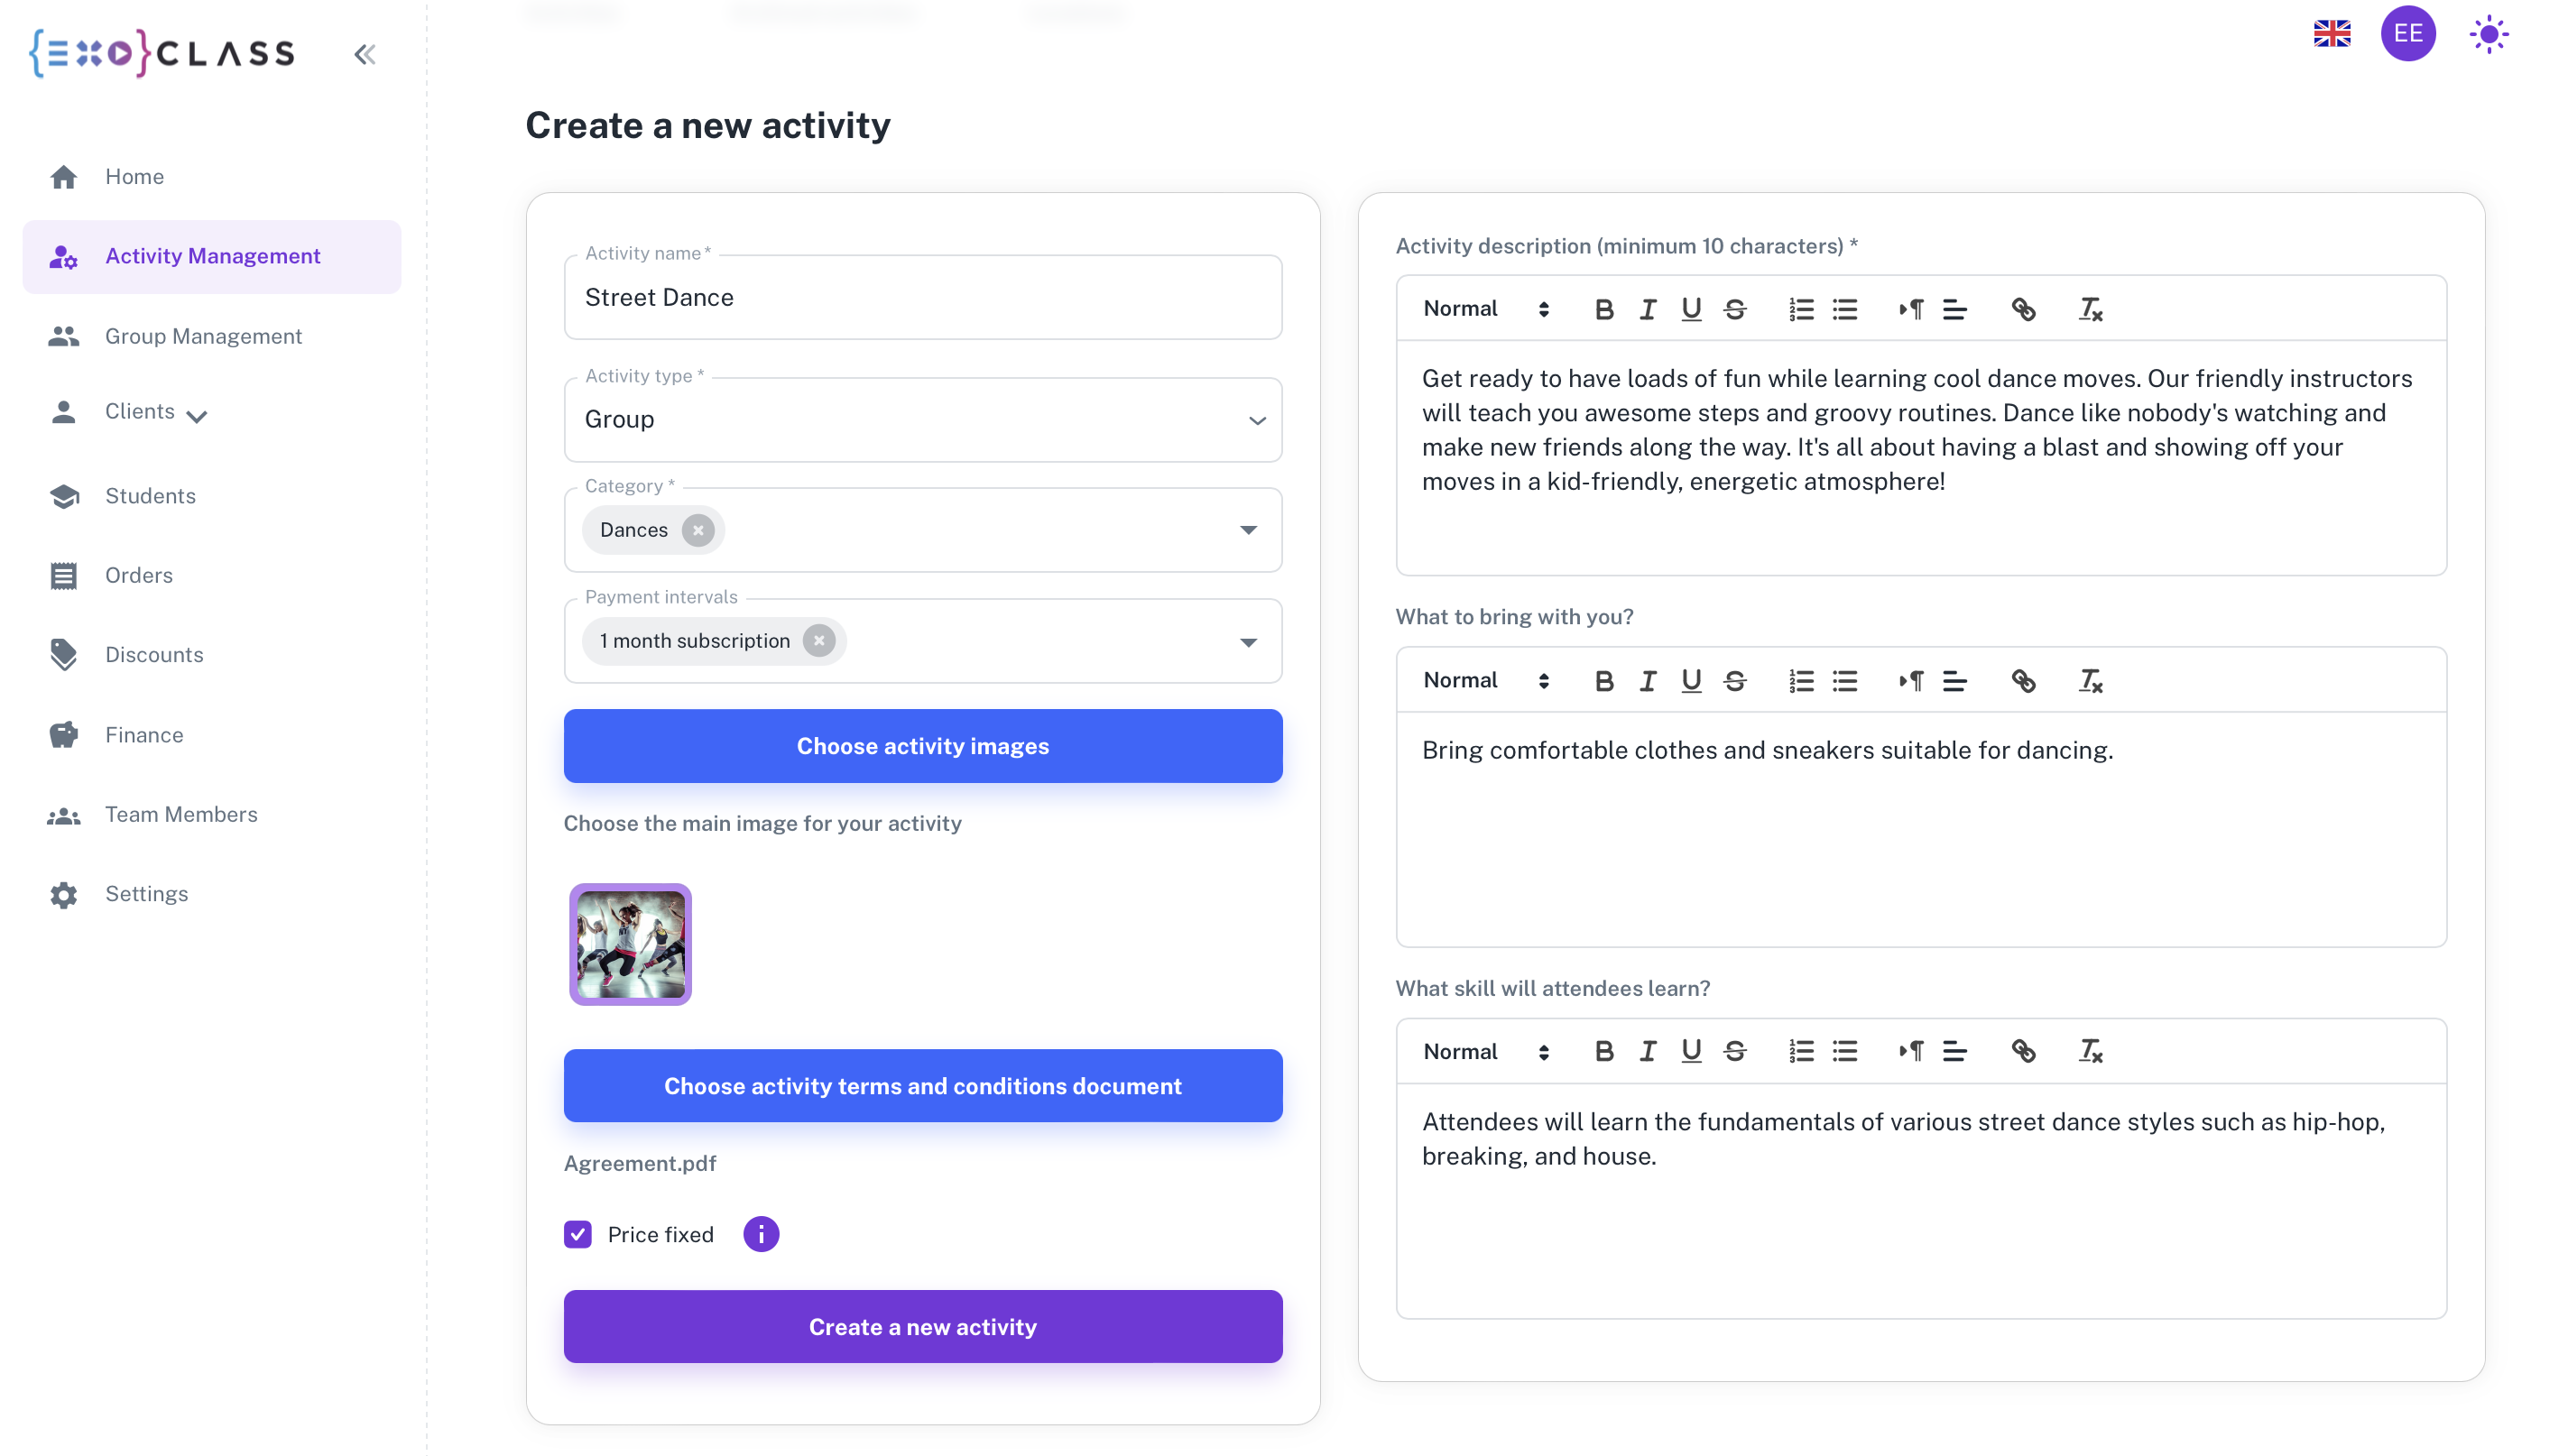
The journey to efficient activity management commences with the creation of an activity. This pivotal step involves gathering essential information that will be later displayed on your registration page. Details such as the activity’s name, type, category, images, service agreements, and descriptions are curated here.

If your organization offers a diverse range of activities, each with its own distinct service agreements, we recommend creating separate activities for each. For instance, if you offer dance classes for kids, teenagers, and adults alongside activities like edtech or martial arts, each with its unique service agreements, it’s best to create individual activities. However, if one service agreement suffices for a specific group, a single activity will serve all.
Pro Tip: When creating activities in your educational activity management system, use descriptive names and appealing images to attract participants. This makes your offerings stand out on the registration page.
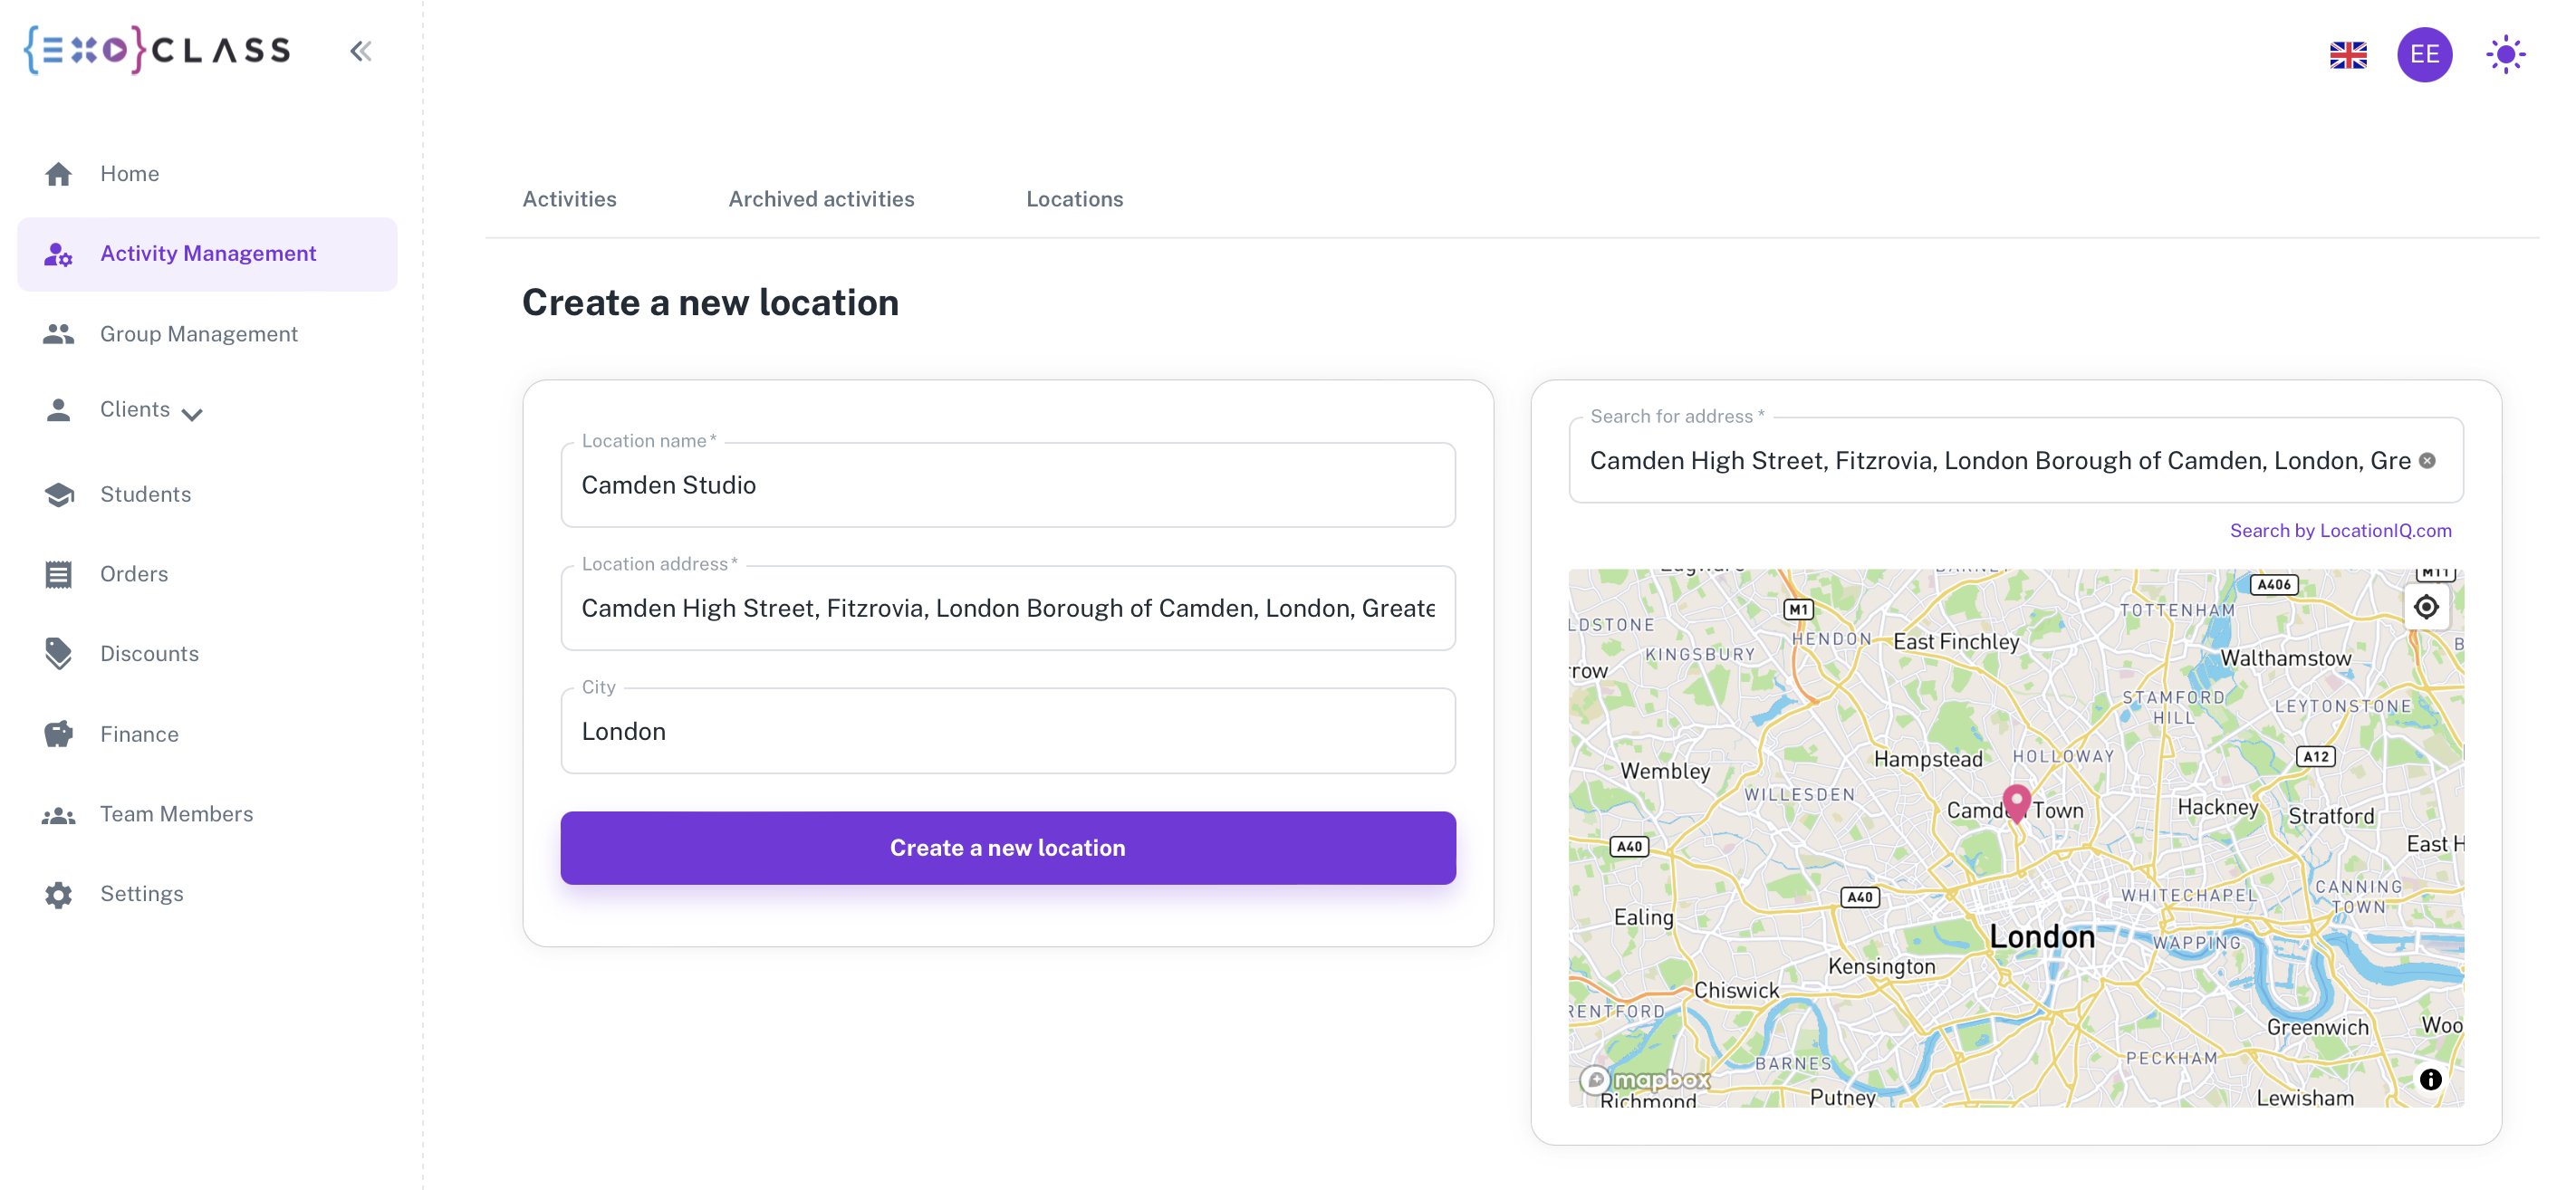
This step is to specify the location where your activities will take place. When creating a location, you can not only enter an address but also the name of the studio or place. And to make it even easier to find your location, you can mark it on an interactive map.

Whether your organization operates from a single location or multiple venues scattered across different areas or cities, all can be effortlessly added and later associated with the specific groups you create.
This ensures a seamless process when you create a group in Exoclass, contributing to streamline educational operations.
Pro Tip: Use precise location details, including landmarks, to make it easier for participants to find your venue, reducing no-shows and late arrivals. A positive and easily navigable school environment influences academic outcomes and student attendance.
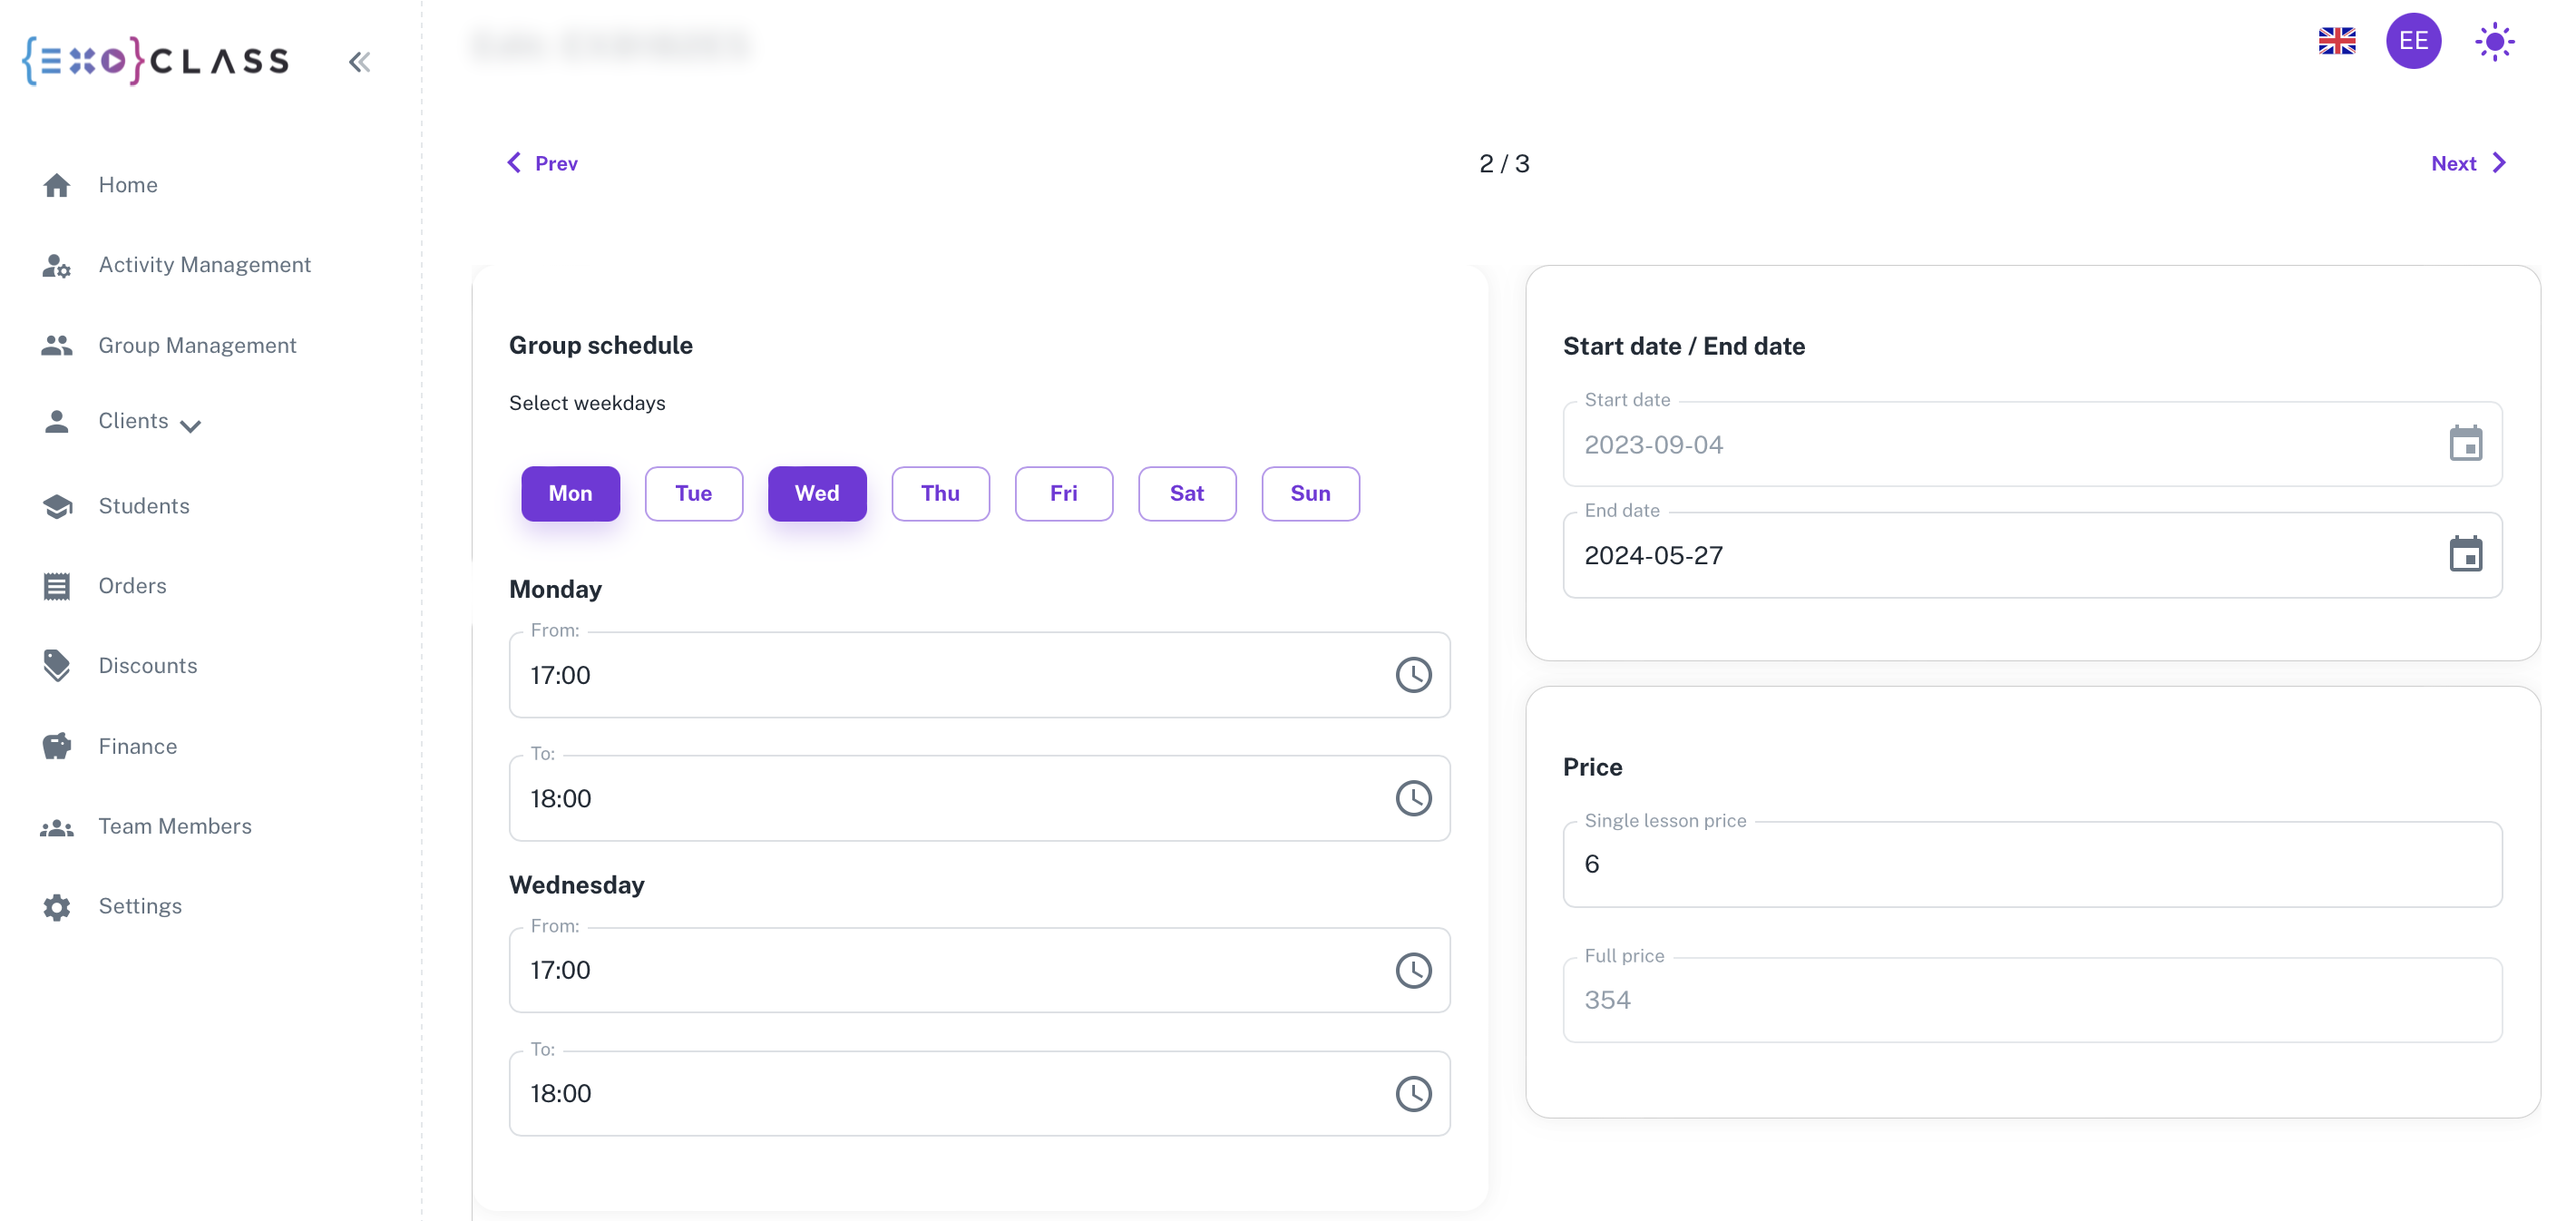
The final and pivotal stage involves the creation of the group itself. This is where the activity and location information you’ve previously entered comes into play. A group typically represents the precise time and location of a specific activity. If your organization serves multiple participant groups, each attending classes at different times, you’ll need to create a unique group for each.
When creating a group, the activity and location can be selected from drop-down menus. Further group creation fields encompass details like group name, difficulty level, age or class range, schedule by days and times, start and end dates, capacity and size, and pricing options. For payment, you can choose from three types: per class, per month, or per season.
What’s more, you can assign specific teachers to each group, empowering them to mark attendance. This step ensures your system is set up to streamline educational operations efficiently.

Pro Tip: Keep group names concise and clear. For instance, “Advanced Ballet – Ages 12–15” is more descriptive than “Ballet Group 3.”
Conclusion
Upon completing these three fundamental steps, you are all set to publish your first group, instantly making it accessible to potential participants through your registration page. By leveraging Exoclass as your educational activity management system, you save time and eliminate administrative hassles, allowing you to focus on delivering quality education.
Embark on your journey towards efficiency, productivity, and success with Exoclass. Try our free trial today and experience the future of educational activity management firsthand!
Next up: The publication of group on the Registration page.
Q: What is Exoclass?
A: Exoclass is an innovative educational activity management system that simplifies group creation, scheduling, invoicing, and participant management for educational organizations.
Q: How do I create a group in Exoclass?
A: Follow three steps: create an activity, set up a location, and organize a group using the intuitive interface.
Q: Can I edit a group after publishing?
A: Yes, Exoclass allows you to make changes to group details, including schedule, capacity, and assigned teachers.
Q: Is there support for multiple payment options?
A: Absolutely! Exoclass supports flexible payment models, including per-class, per-month, and per-season options, making it easy to tailor plans for diverse client needs. This flexibility enhances customer satisfaction by allowing organizations to align pricing with participant preferences. Explore more about customizable payment strategies to optimize your billing process here.
Q: How does Exoclass streamline educational operations?
A: Exoclass streamlines educational operations by automating repetitive tasks like scheduling, invoicing, and attendance tracking, reducing manual workload and saving valuable time. Additionally, its centralized platform simplifies data management and communication, ensuring smooth coordination across teams. This efficiency allows educators to focus more on delivering quality learning experiences.
References:
