Bureliai.lt: how EXOCLASS is creating a new era of after-school club management
2026 will mark a major turning point for Lithuania’s non-formal...

In our previous guide, we discussed the process of creating a group, which is the starting point of using Exoclass. Publishing and managing groups effectively is crucial for ensuring a smooth club registration process. With Exoclass group publishing, you can control which classes appear on your online class management system, making it easier for clients to sign up. This guide walks you through the steps to publish groups, manage your studio scheduling software, and optimize your automated client registration.
When you create a group, it doesn’t automatically get published. This is to ensure that all details are correctly entered before clients access them through the club registration process.
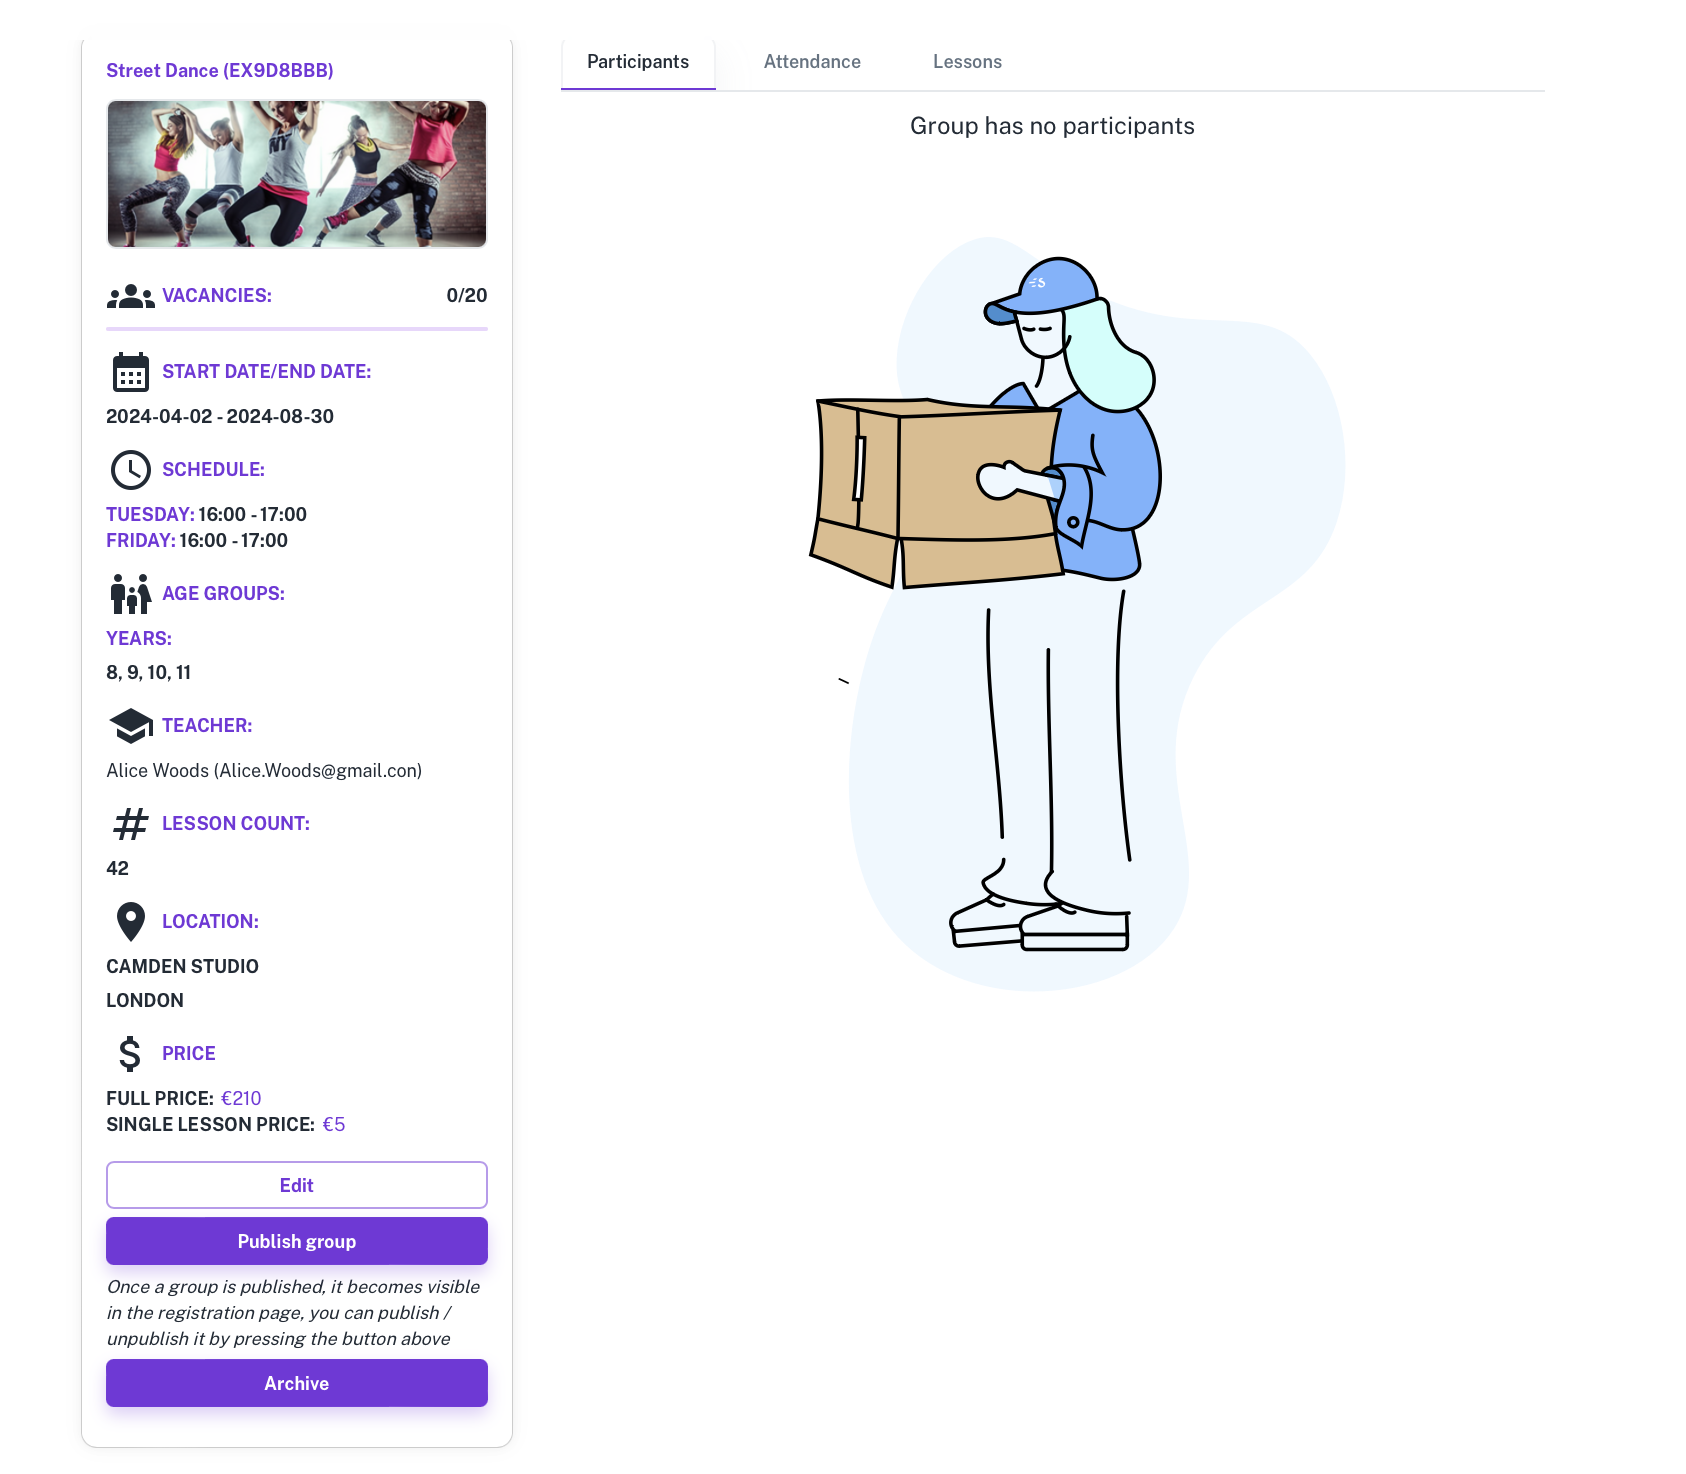
Before publishing, a preview box appears, showing key information about the group. This feature helps you verify that all details are accurate before making the group live in the online class management system.

Once you confirm the details, you can publish the group with a single click, making it visible for automated client registration.
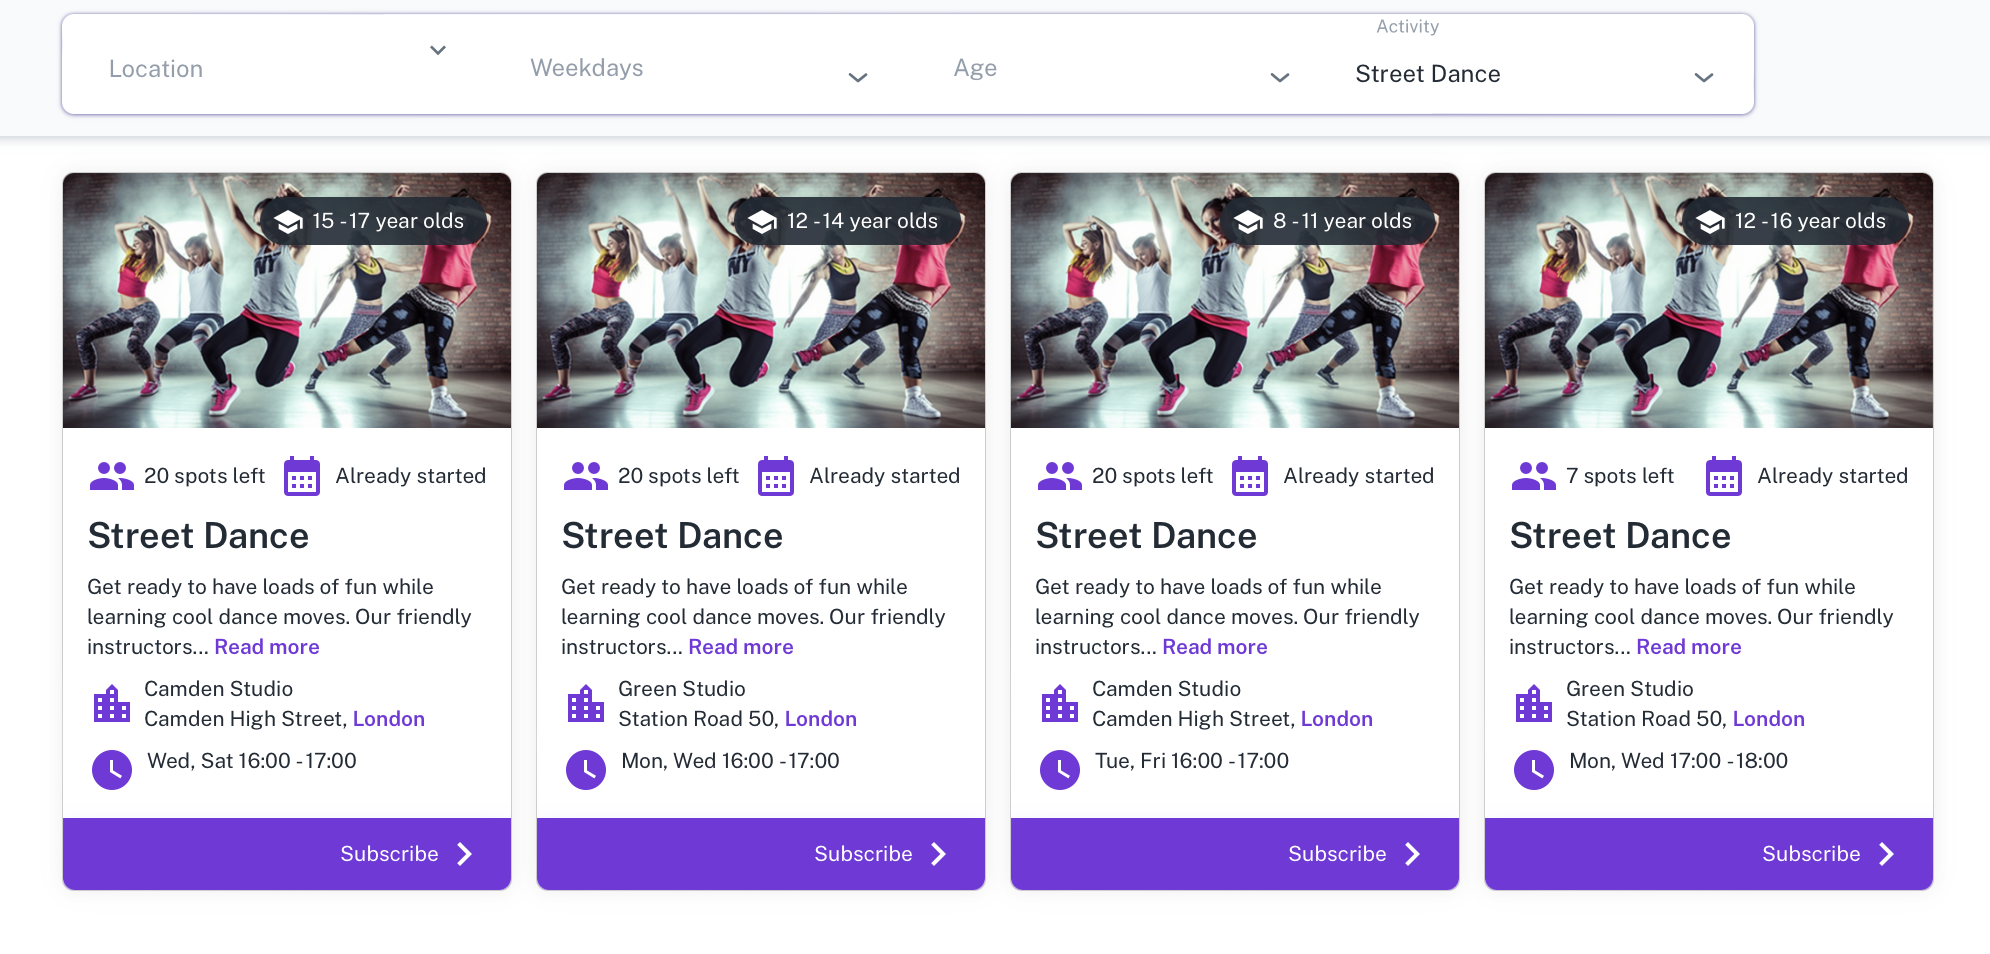
Every Exoclass user has a unique registration page that displays only the groups they organize. You can find your registration page by clicking on the round avatar in the upper right corner of the Exoclass page and selecting the “Registration Page” section. Here, you’ll see all the groups you’ve published publicly, and you can share the page’s URL with your clients.

Exoclass studio scheduling software allows filtering groups based on activity type, time, or day, making it easier for clients to find the right classes. These filters can be adjusted in the system settings to add or remove filtering options. These filters enhance the club registration process, ensuring smooth navigation for parents and students.
If you want to add buttons to your website that directly lead to specific group registrations based on activity, day, or time, you can filter your desired choice, copy the page’s URL, and paste it into a button on your website. This way, clients will be directed to your pre-filtered group selection.
Additionally, you can integrate this page as a separate block on your website. However, for details on integrating the registration page into your website, we recommend contacting us directly so we can provide specific links and recommendations.
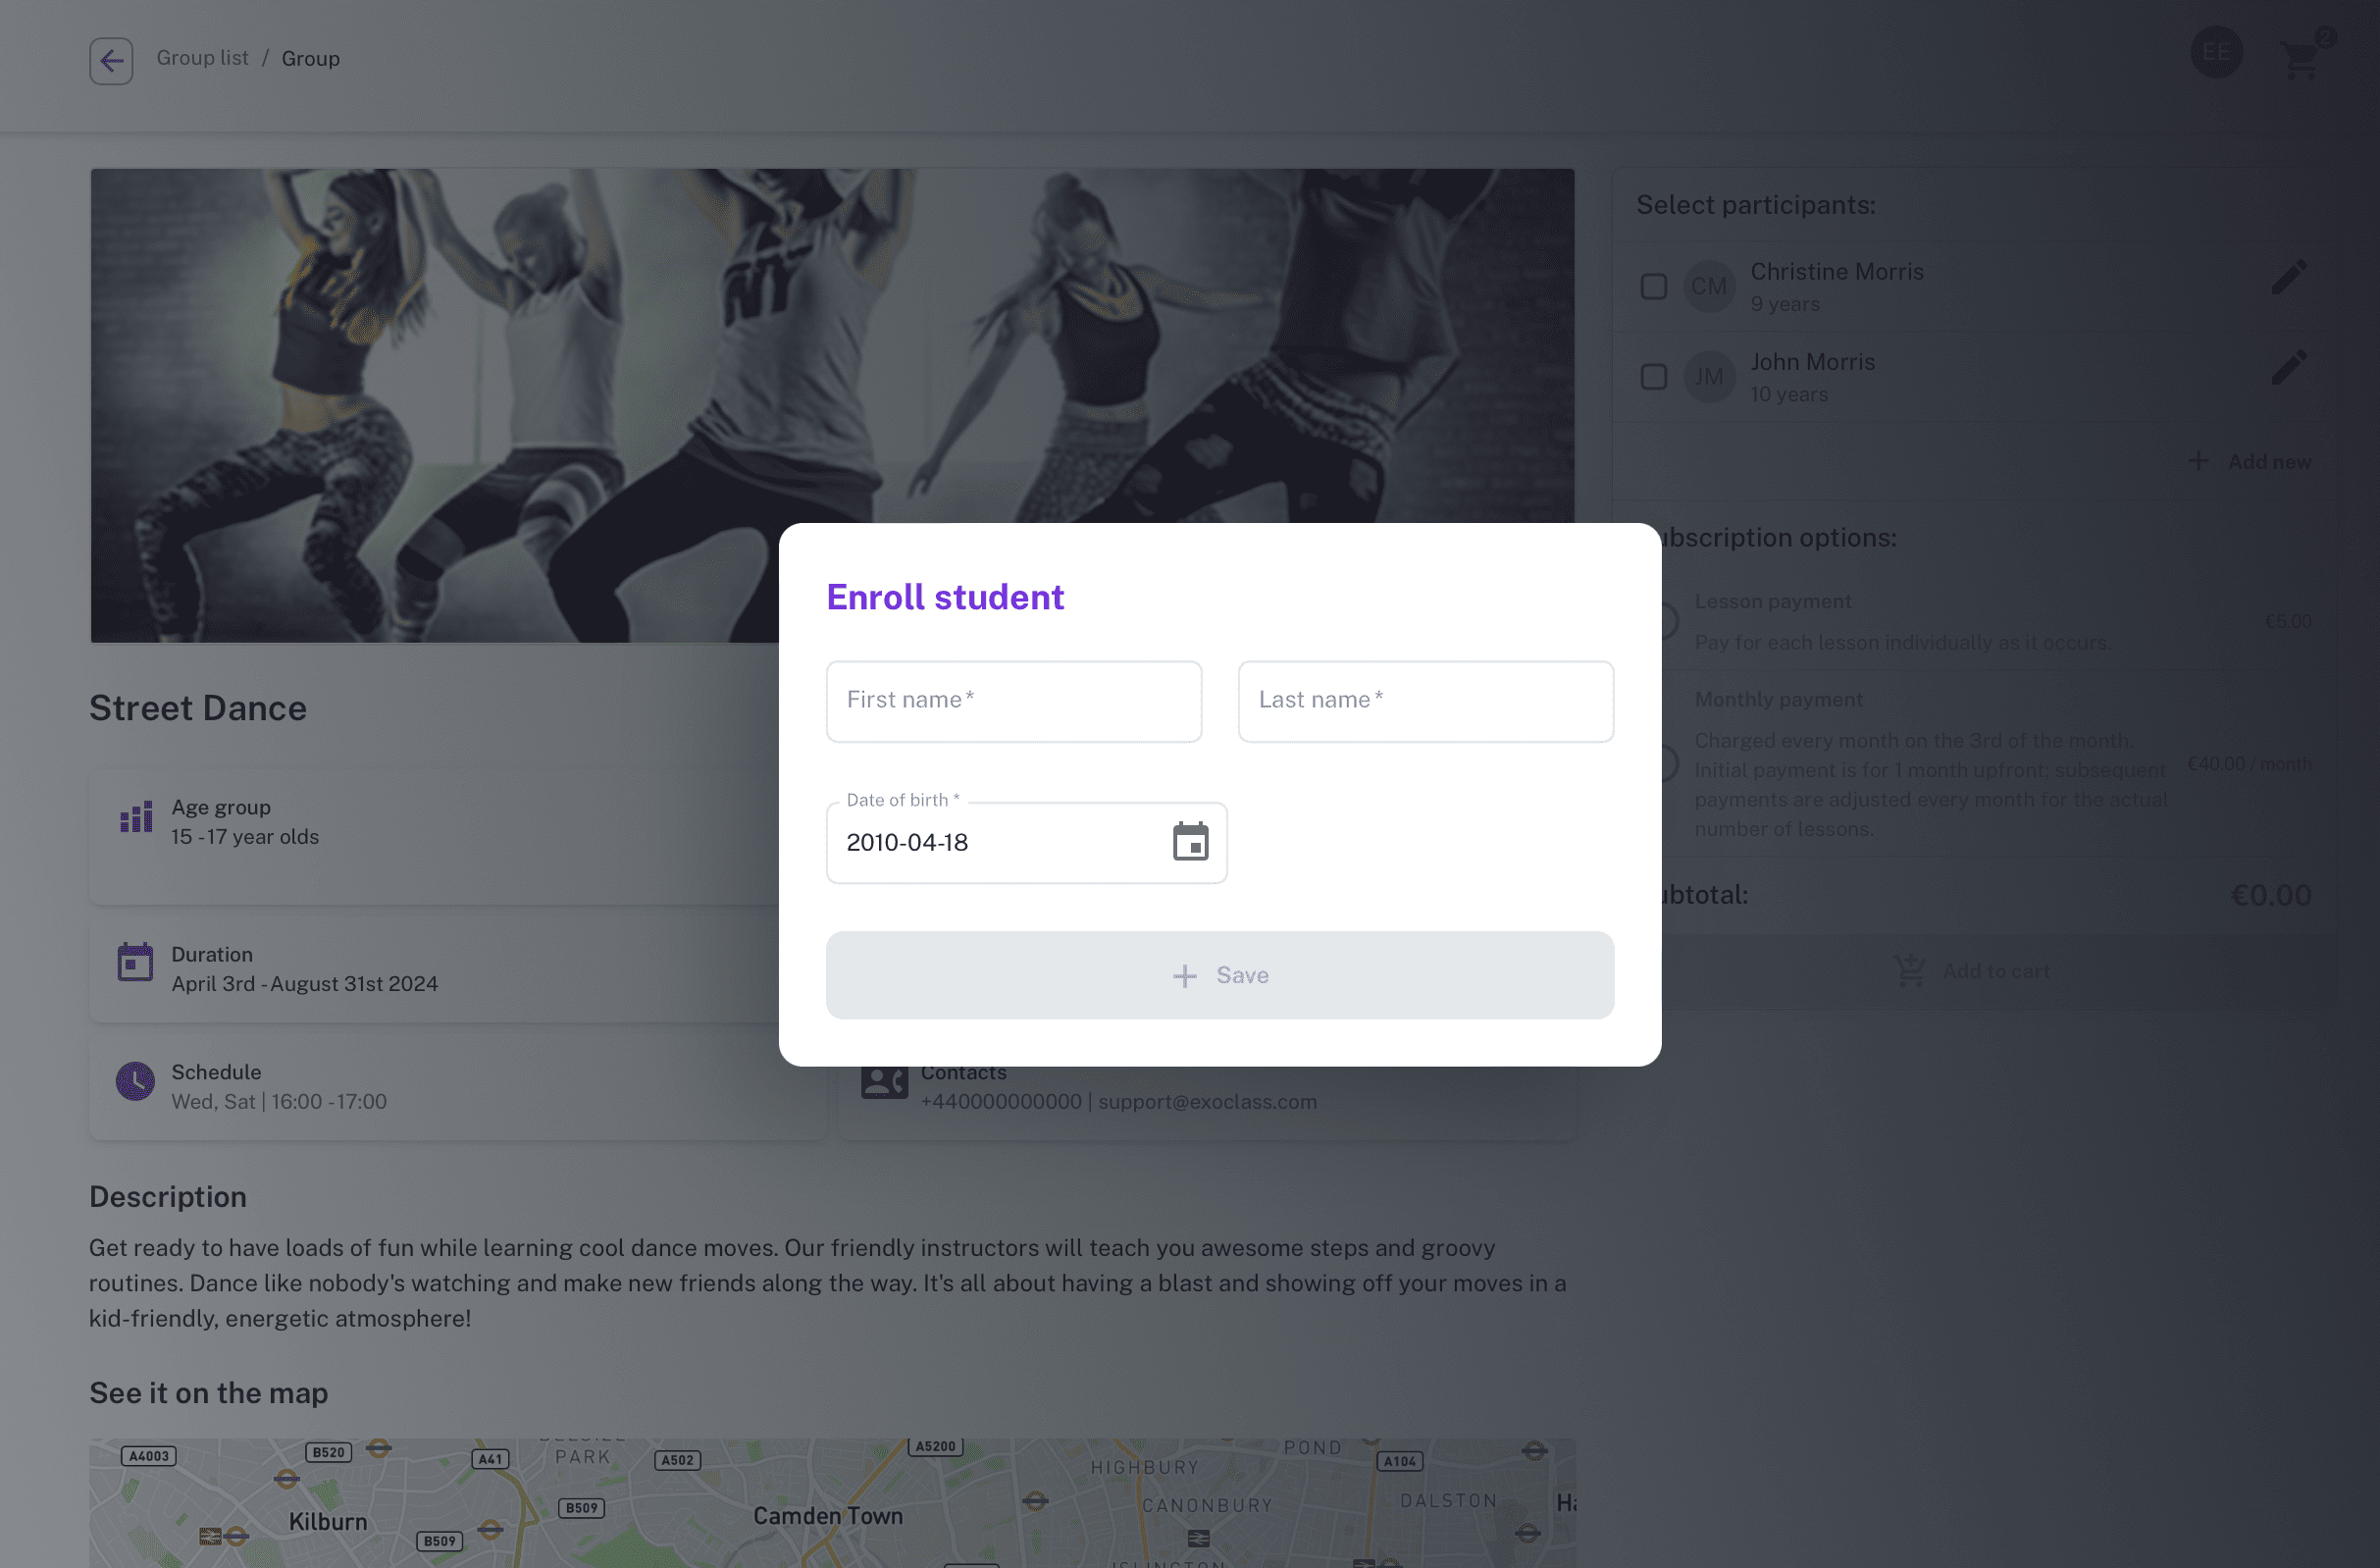
When a client clicks on a group, they will see all the information related to that group, including details they provided during the creation of the activity, location, and group. After familiarizing themselves with the group’s description, clients can easily register themselves or their children for the group by providing their personal information.

If your group uses the “per session” payment type, the system will automatically calculate the amount to be paid for the remaining sessions in the current month. If the payment type is “monthly,” clients will be informed of the total monthly amount. For “full price” payment, the system will specify the payment amount according to the sessions planned until the end of the season.
At checkout, clients review and sign the service contract, ensuring compliance with financial agreements. This step also allows you to provide the information needed for external financing contracts, if your group uses one.
After registering for a group, the Exoclass system takes care of communication with clients. Before the first session, the system will send clients an automated email containing all the necessary information related to the group.
Studio scheduling software integration also ensures that payments are automated. Based on the selected payment type, Exoclass generates invoices and sends reminders for upcoming dues, streamlining the entire online class management system for both administrators and clients.
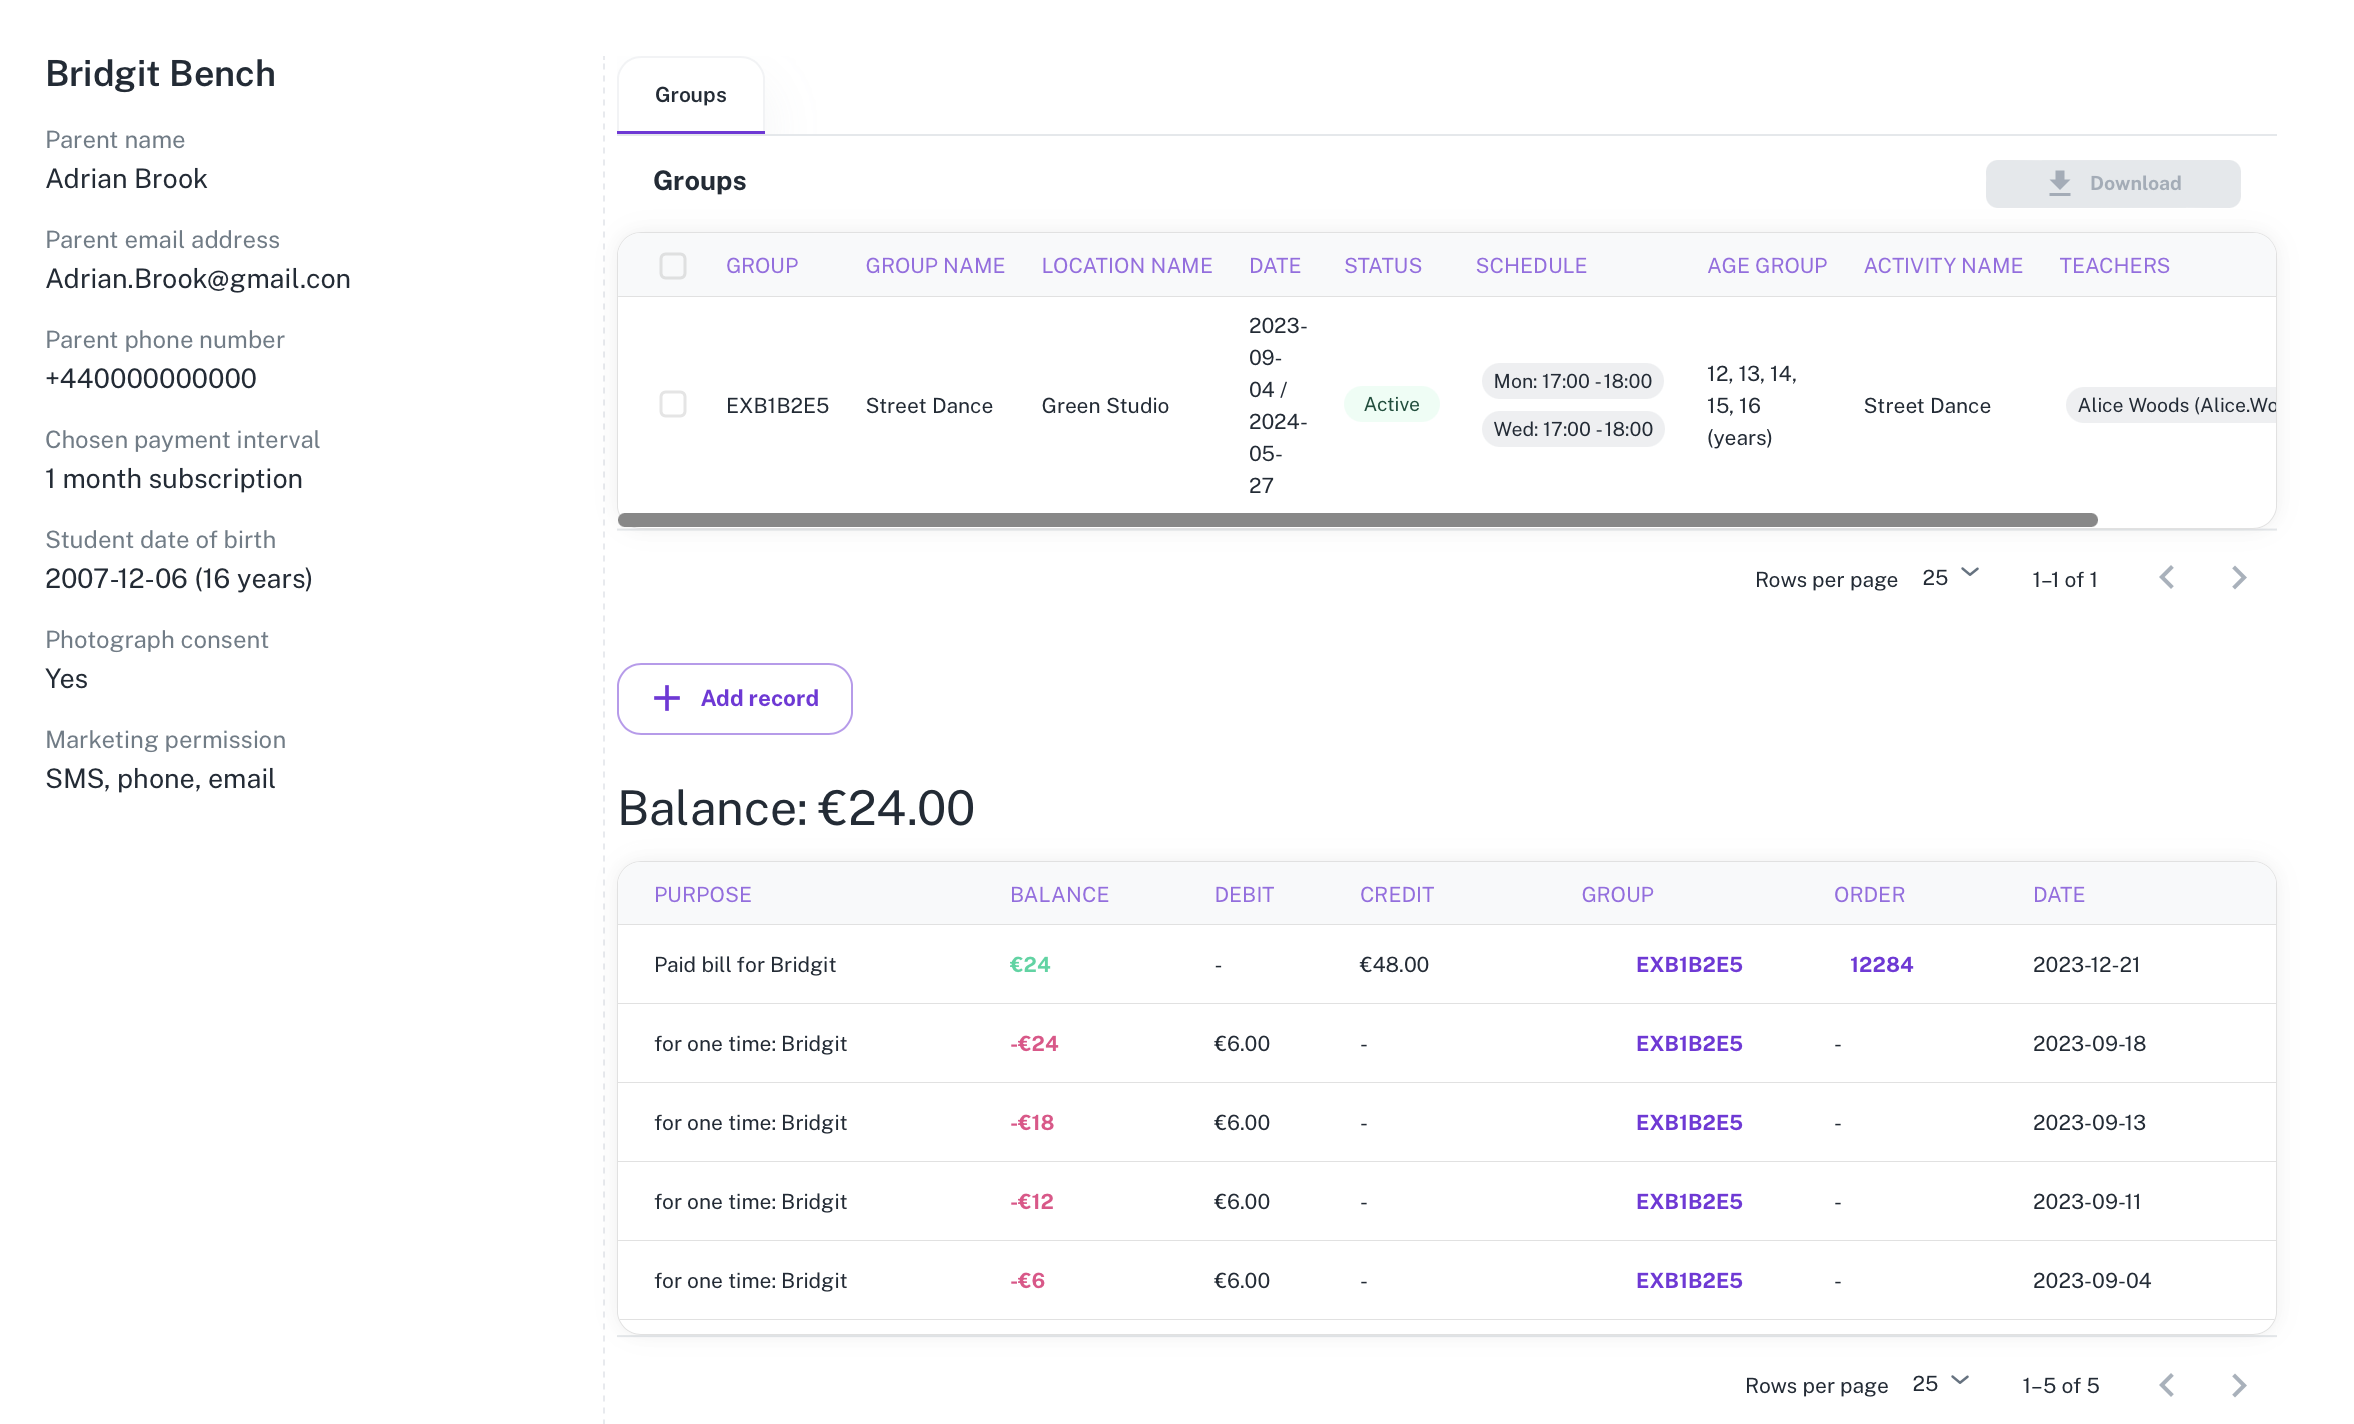
After clients register for a group, you can find their contact and payment information in the “Clients” section. This section usually contains information about the responsible adult and the children they have registered.
The participants themselves are displayed in the “Students” section, where you can find the students’ information, the groups they are attending, and their balance.

To view the specific participants of a group, navigate to the “Group Management” section, select the desired group, and open it. Here, you’ll immediately see a list of all the group’s participants, and with a single click, you can access their profiles.
That covers it for now! If you’re interested in trying out the Exoclass system for your business, feel free to reach out to us for a free trial. With this trial, you can explore the entire functionality of Exoclass without making actual payments
1. How can I track payments from registered clients?
The Finance section in Exoclass provides a detailed overview of all client transactions, invoices, and outstanding balances. Payments are categorized by method (e.g., Stripe, Paysera, cash, or bank transfer), allowing for easy tracking. If a client has unpaid invoices, they will appear in the Debtors section, ensuring efficient follow-up. You can also manually add or adjust balance entries for clients when needed.
2. What if a client wants to cancel their registration?
Clients cannot directly cancel their registration themselves. However, administrators can remove a participant from a group via the Group Management section. If refunds are required, the system allows for full or partial refunds, which must be processed manually through the organization’s payment provider. Additionally, you can apply cancellation policies by adjusting balance entries to reflect fees or credits.
3. Can I add multiple administrators to manage my groups?
Yes! Exoclass supports multi-admin access, allowing organizations to assign different roles to staff members. You can invite team members via the Team Members section, assigning them roles such as Teacher or Administrator. This helps distribute responsibilities like attendance tracking, student management, and finance oversight while maintaining controlled access to sensitive data.
4. How does Exoclass automate invoices and reminders?
Exoclass automatically generates invoices based on the selected subscription type. For monthly plans, invoices are sent out on a fixed schedule, while session-based plans trigger invoices once the prepaid sessions are used up. If a client fails to complete a payment, the system can send reminders and even retry the charge on designated days. You can customize additional charge days in the Invoice Reminders section to ensure clients have multiple opportunities to complete their payments.

