
EXOCLASS 2025 Functionalities
2025 brought the most mature version of EXOCLASS to date...

Teachers’ daily work involves combining quality teaching with administrative procedures. Exoclass simplifies these tasks with a studio admin system that centralizes attendance tracking, group management, and lesson history. It’s an all-in-one solution for teachers and administrators in studios and clubs.
In this guide, we will discuss the main functionalities of our club management system for teachers: group management, attendance marking, lesson history and other features that ensure a smooth delivery of educational services.
When you receive the invitation in your email, log in to your Exoclass account. This initial step connects you to a teacher management software, helping you streamline your daily tasks, from managing classes to tracking attendance.
Head to the section “Settings” and fill in the personal information fields. After filling in the data, press the green tick icon to save the information in the system.
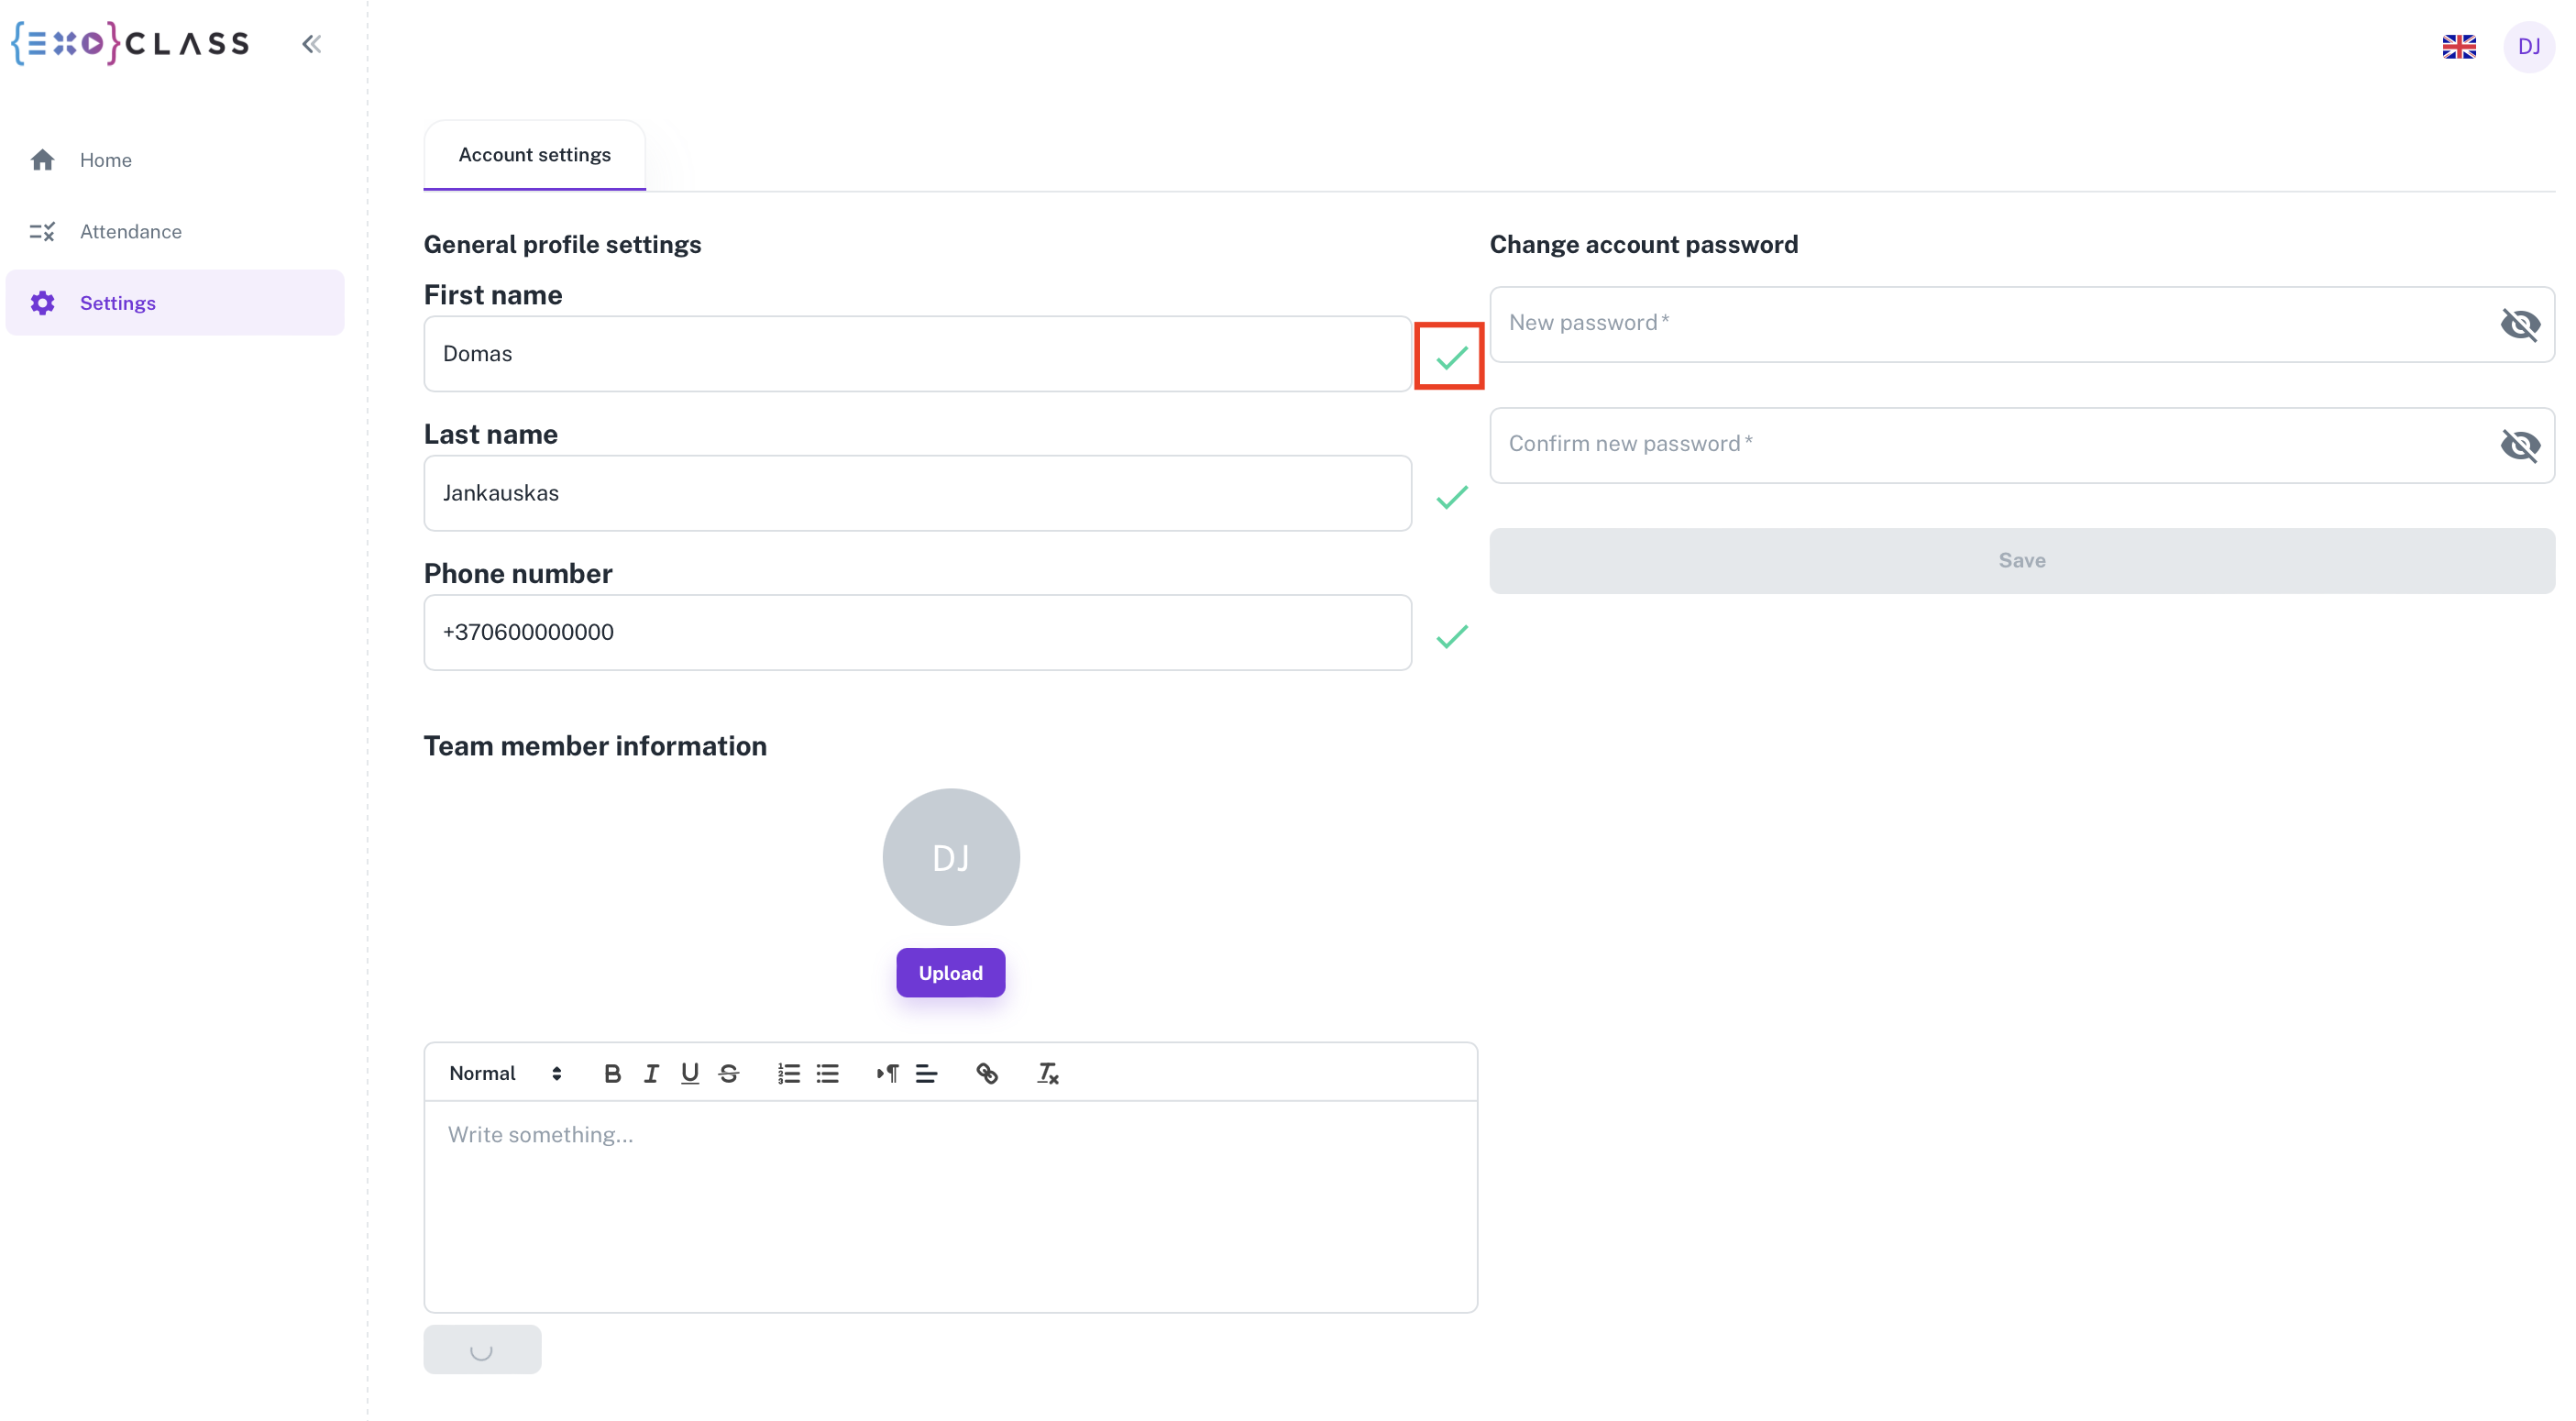
Also, if needed, fill in your description, which will be displayed on the registration page next to the groups you lead. If you would like to add a video to the description, please contact your account administrator.
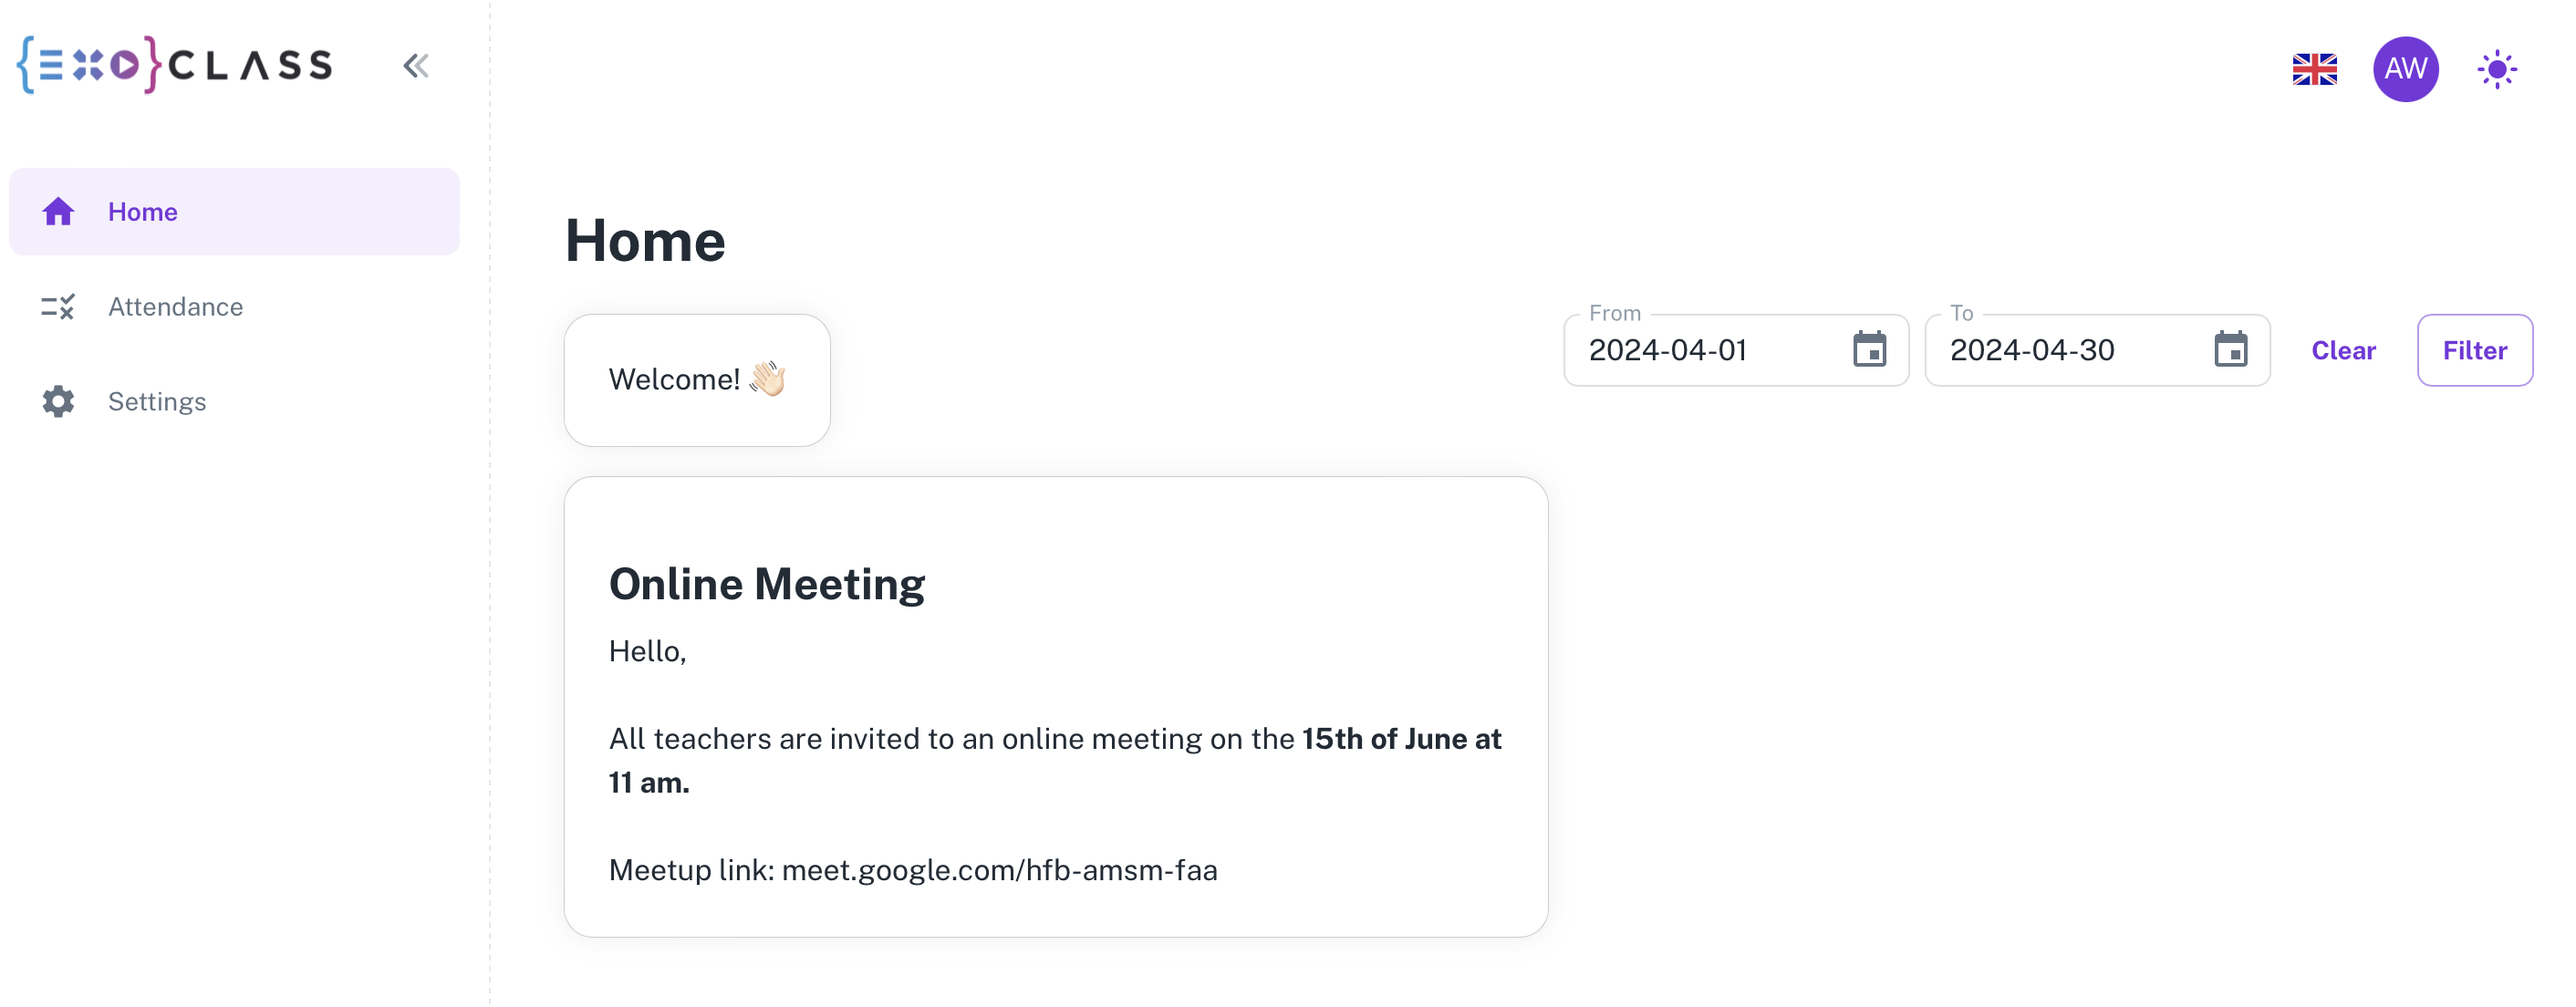
In the “Home” tab, you can view the announcements published by the organisation’s administration.
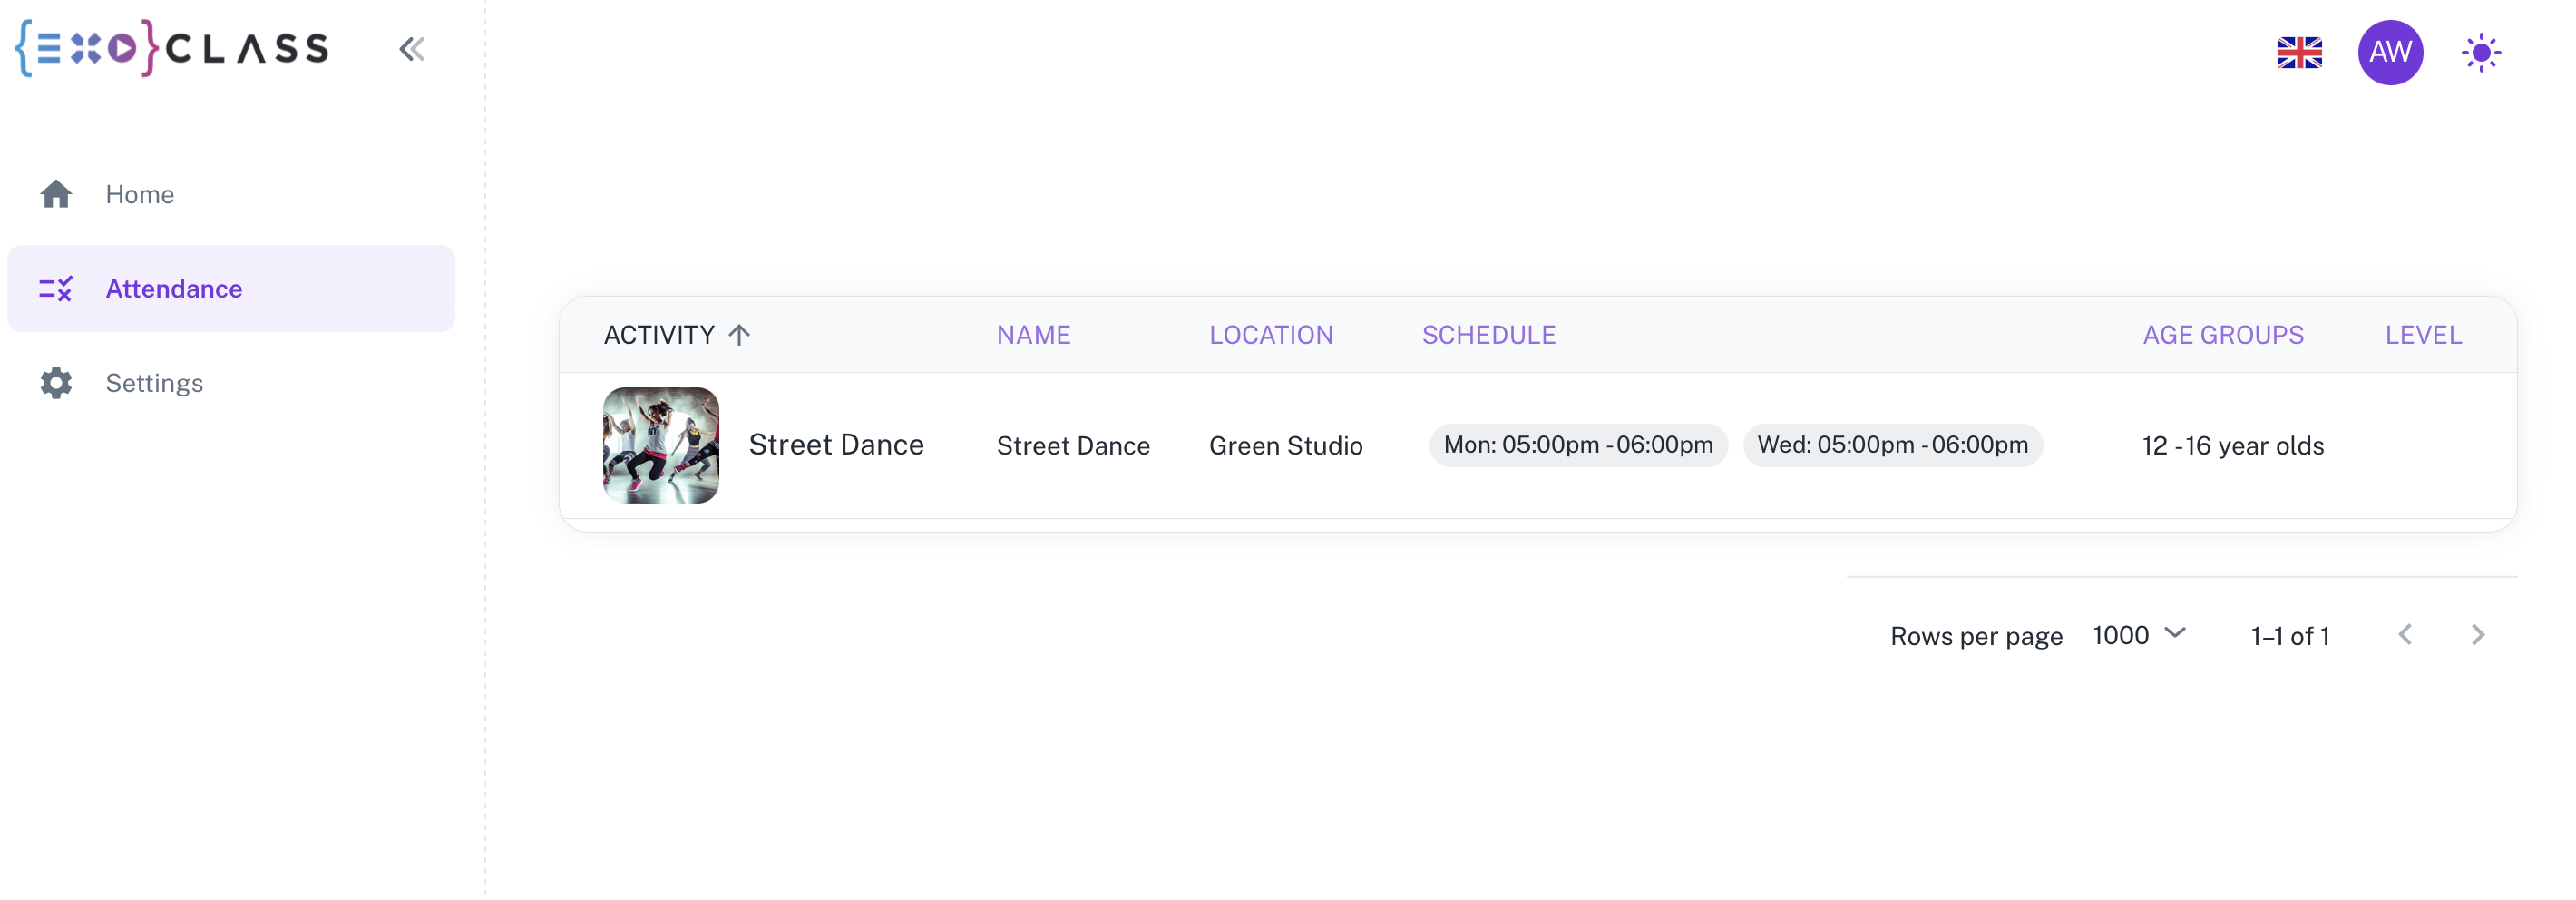
In the “Attendance” tab, you can access all the groups you have been assigned to and view their details. This feature makes studio attendance tracking simple and reliable, whether you’re managing a small group or a large class. Click on the relevant group name to view the group students and mark attendance.
Note: Groups will be visible to teachers only when at least one student has registered for the published group.
Note: Attendance marking is locked at midnight of the same day. For this reason, it is essential to mark attendance before the end of the current day. If you need to mark or adjust your attendance for previous or future days, please reach out to your organisation’s administrator.
In the “Mark attendance” tab, you can mark attendance for each student individually or simultaneously. To give the same attendance value to all students, click on the “All participants” value box in the top row.
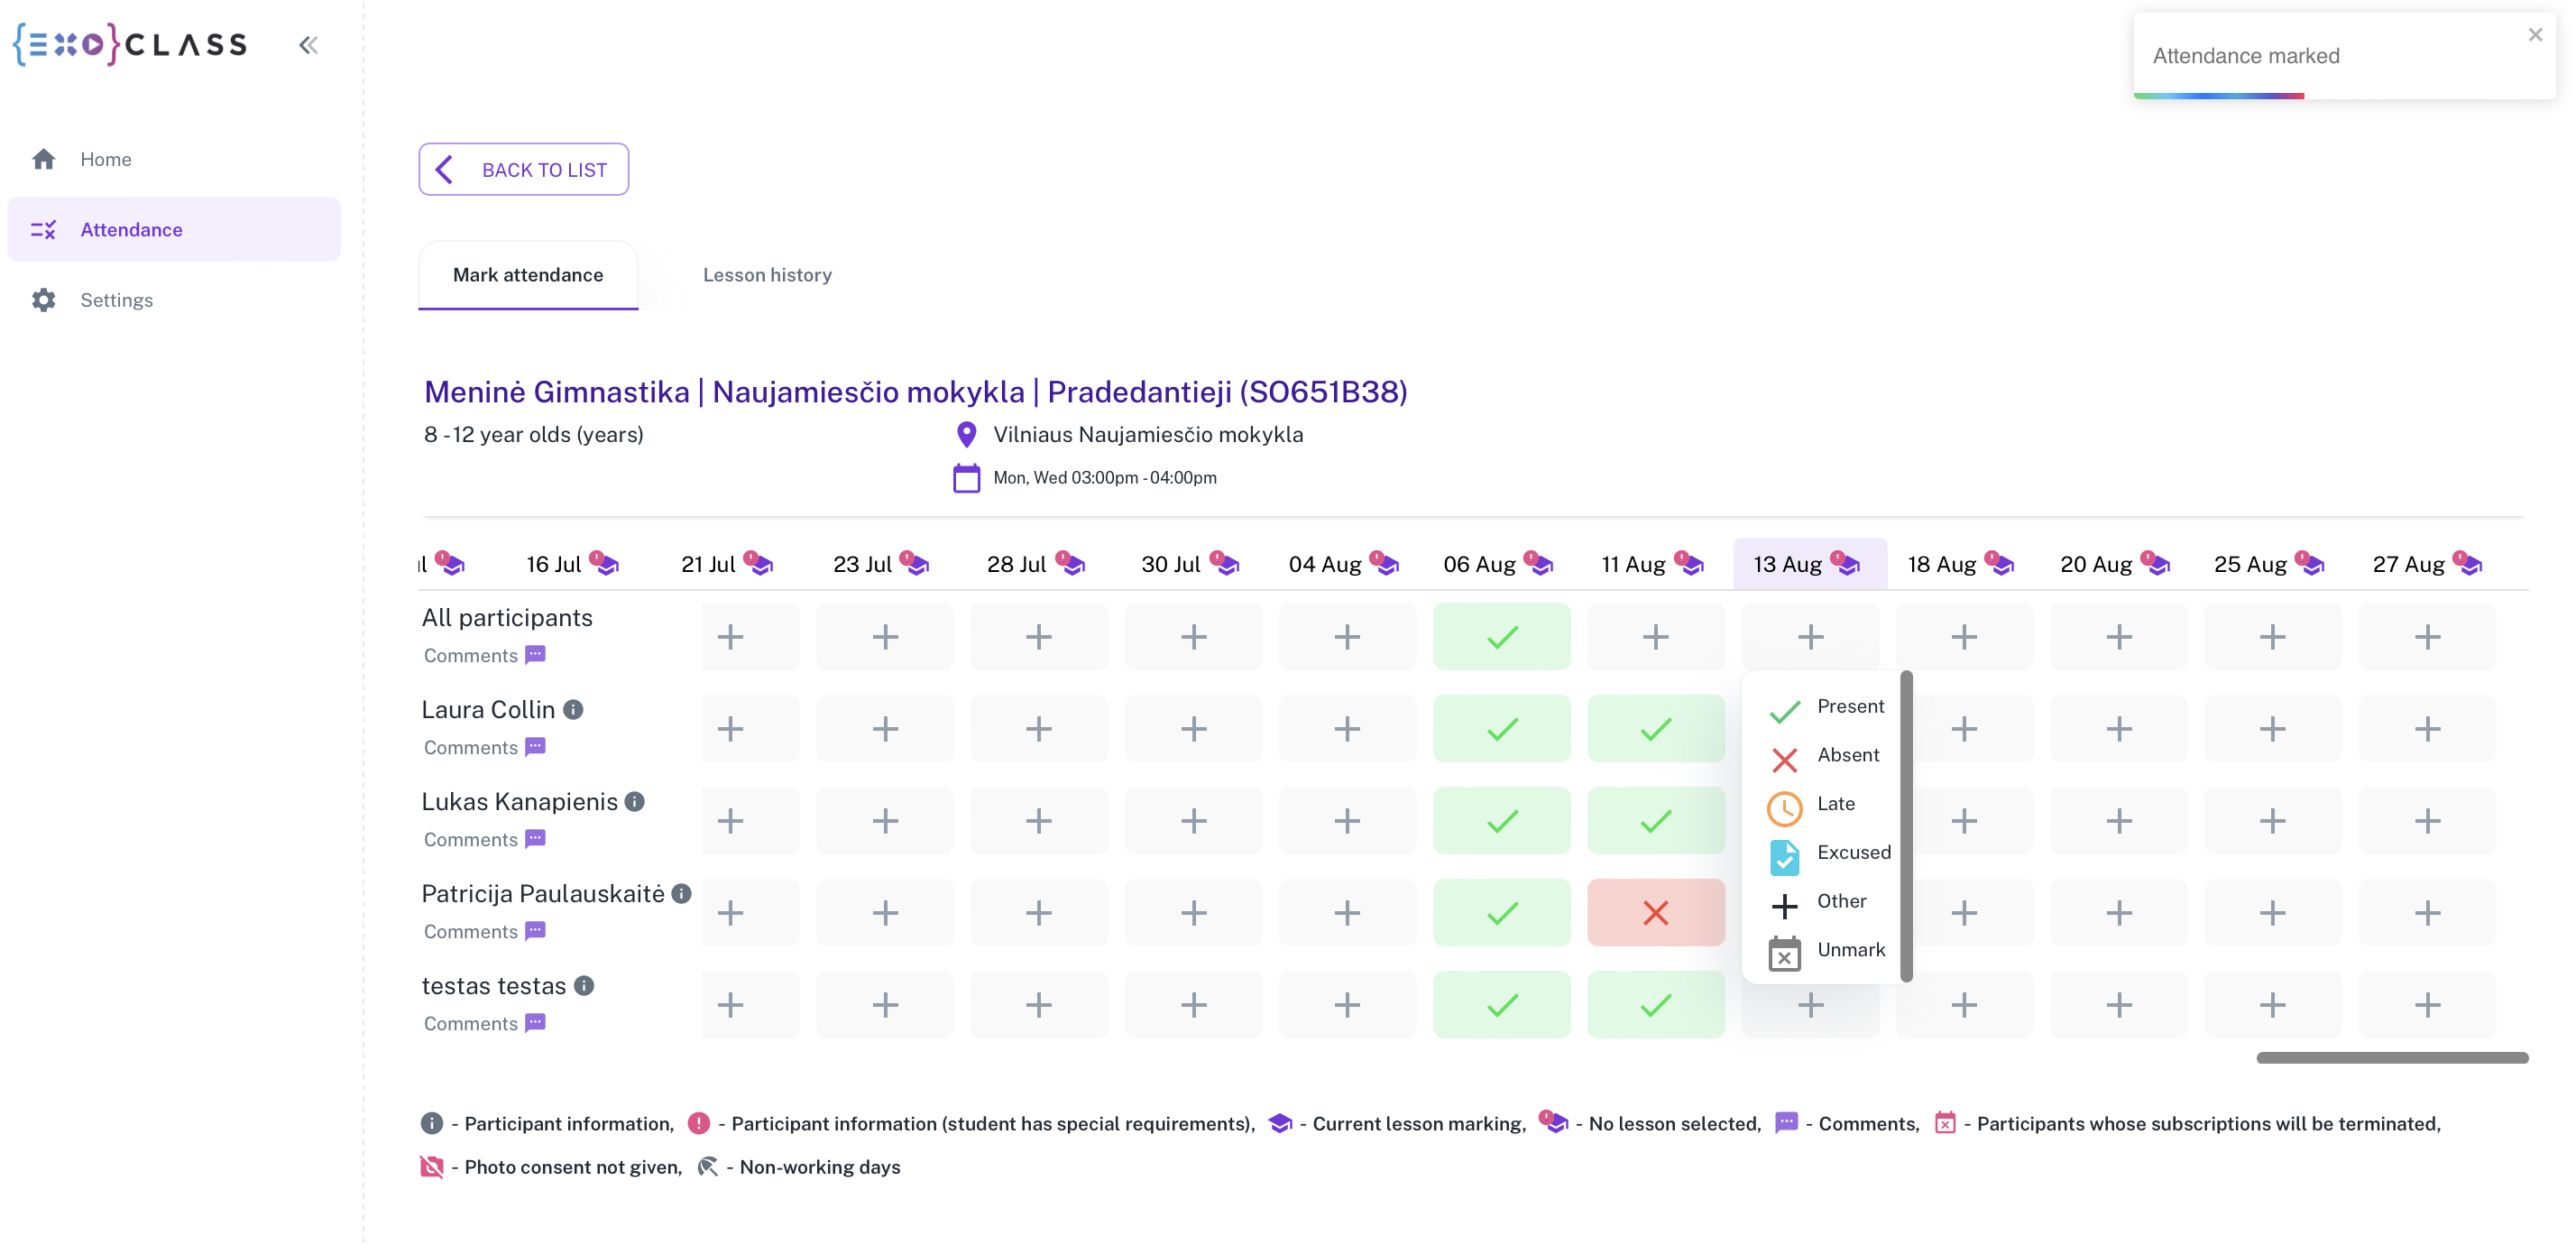
For marking attendance, the following options are available:
1 click – Present
2 clicks – Absent
3 clicks – Late
4 clicks – Removes the attendance status previously set for the student.
The account administrator can mark the value “Excused,” which reimburses the student for the cost of one lesson (unless otherwise specified).
If a teacher did not mark the attendance for the prior class, all students are automatically assigned “Absent” (unless otherwise specified).
If your organization also collects extra student data, this information will be shown next to the student’s name under a specific icon. You can find the icon legend below the attendance table.
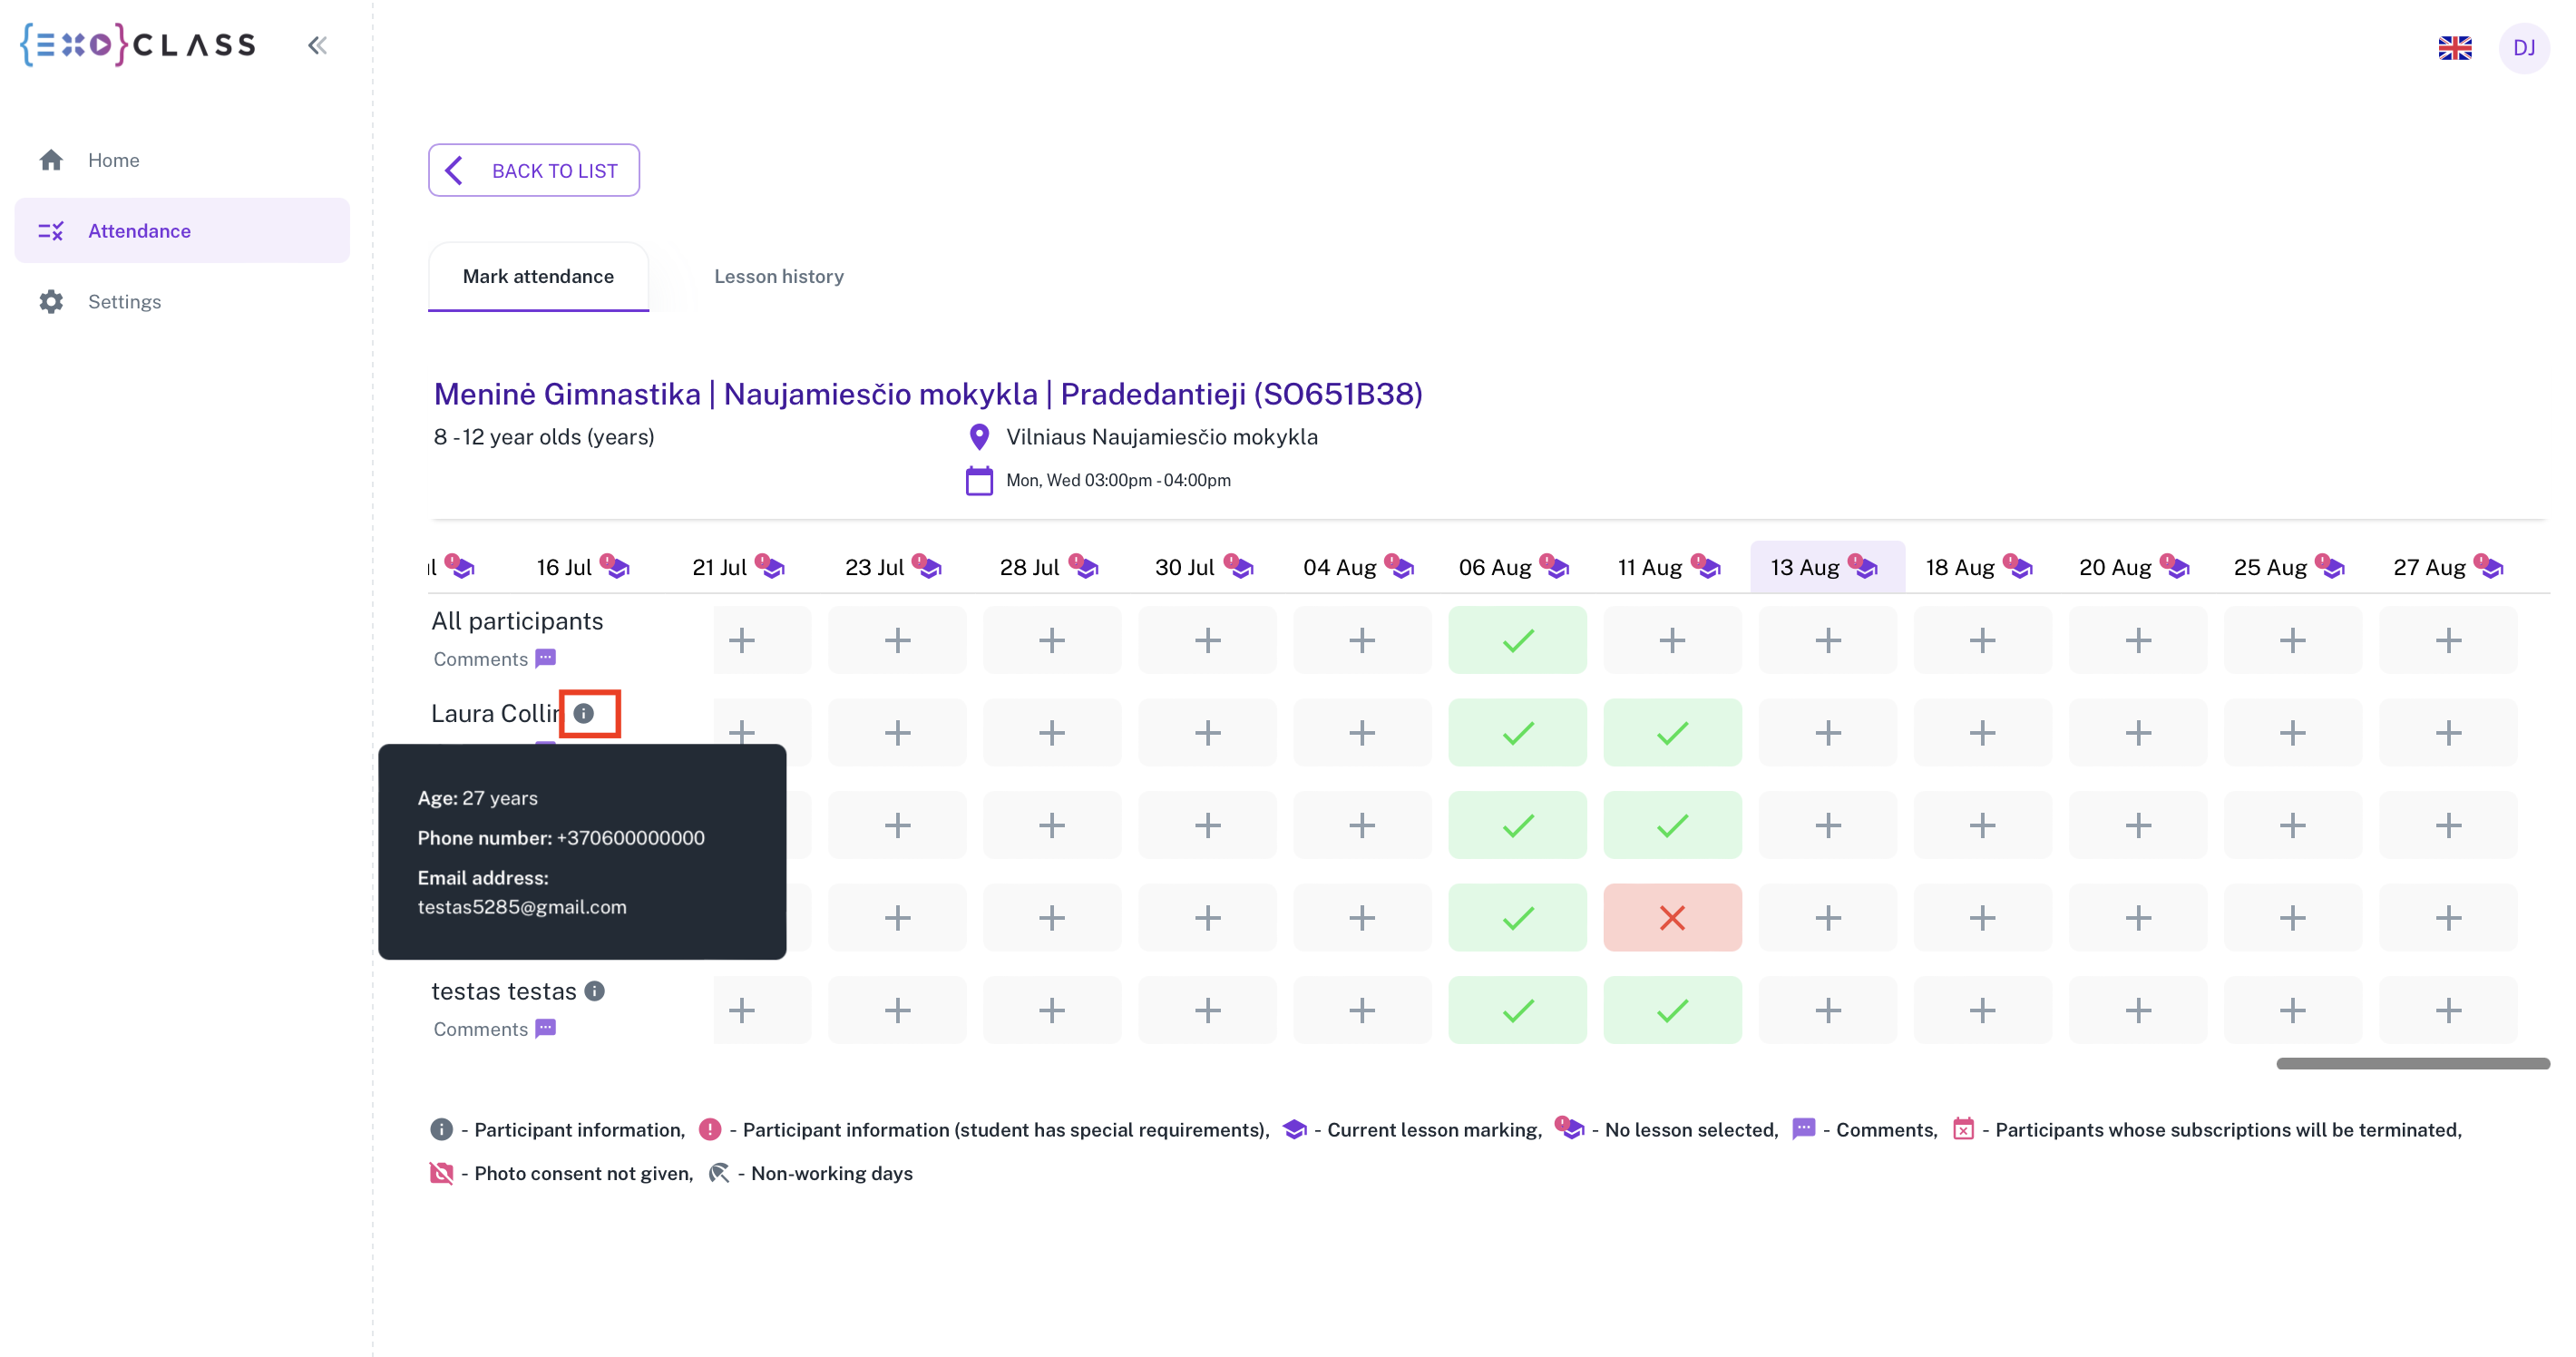
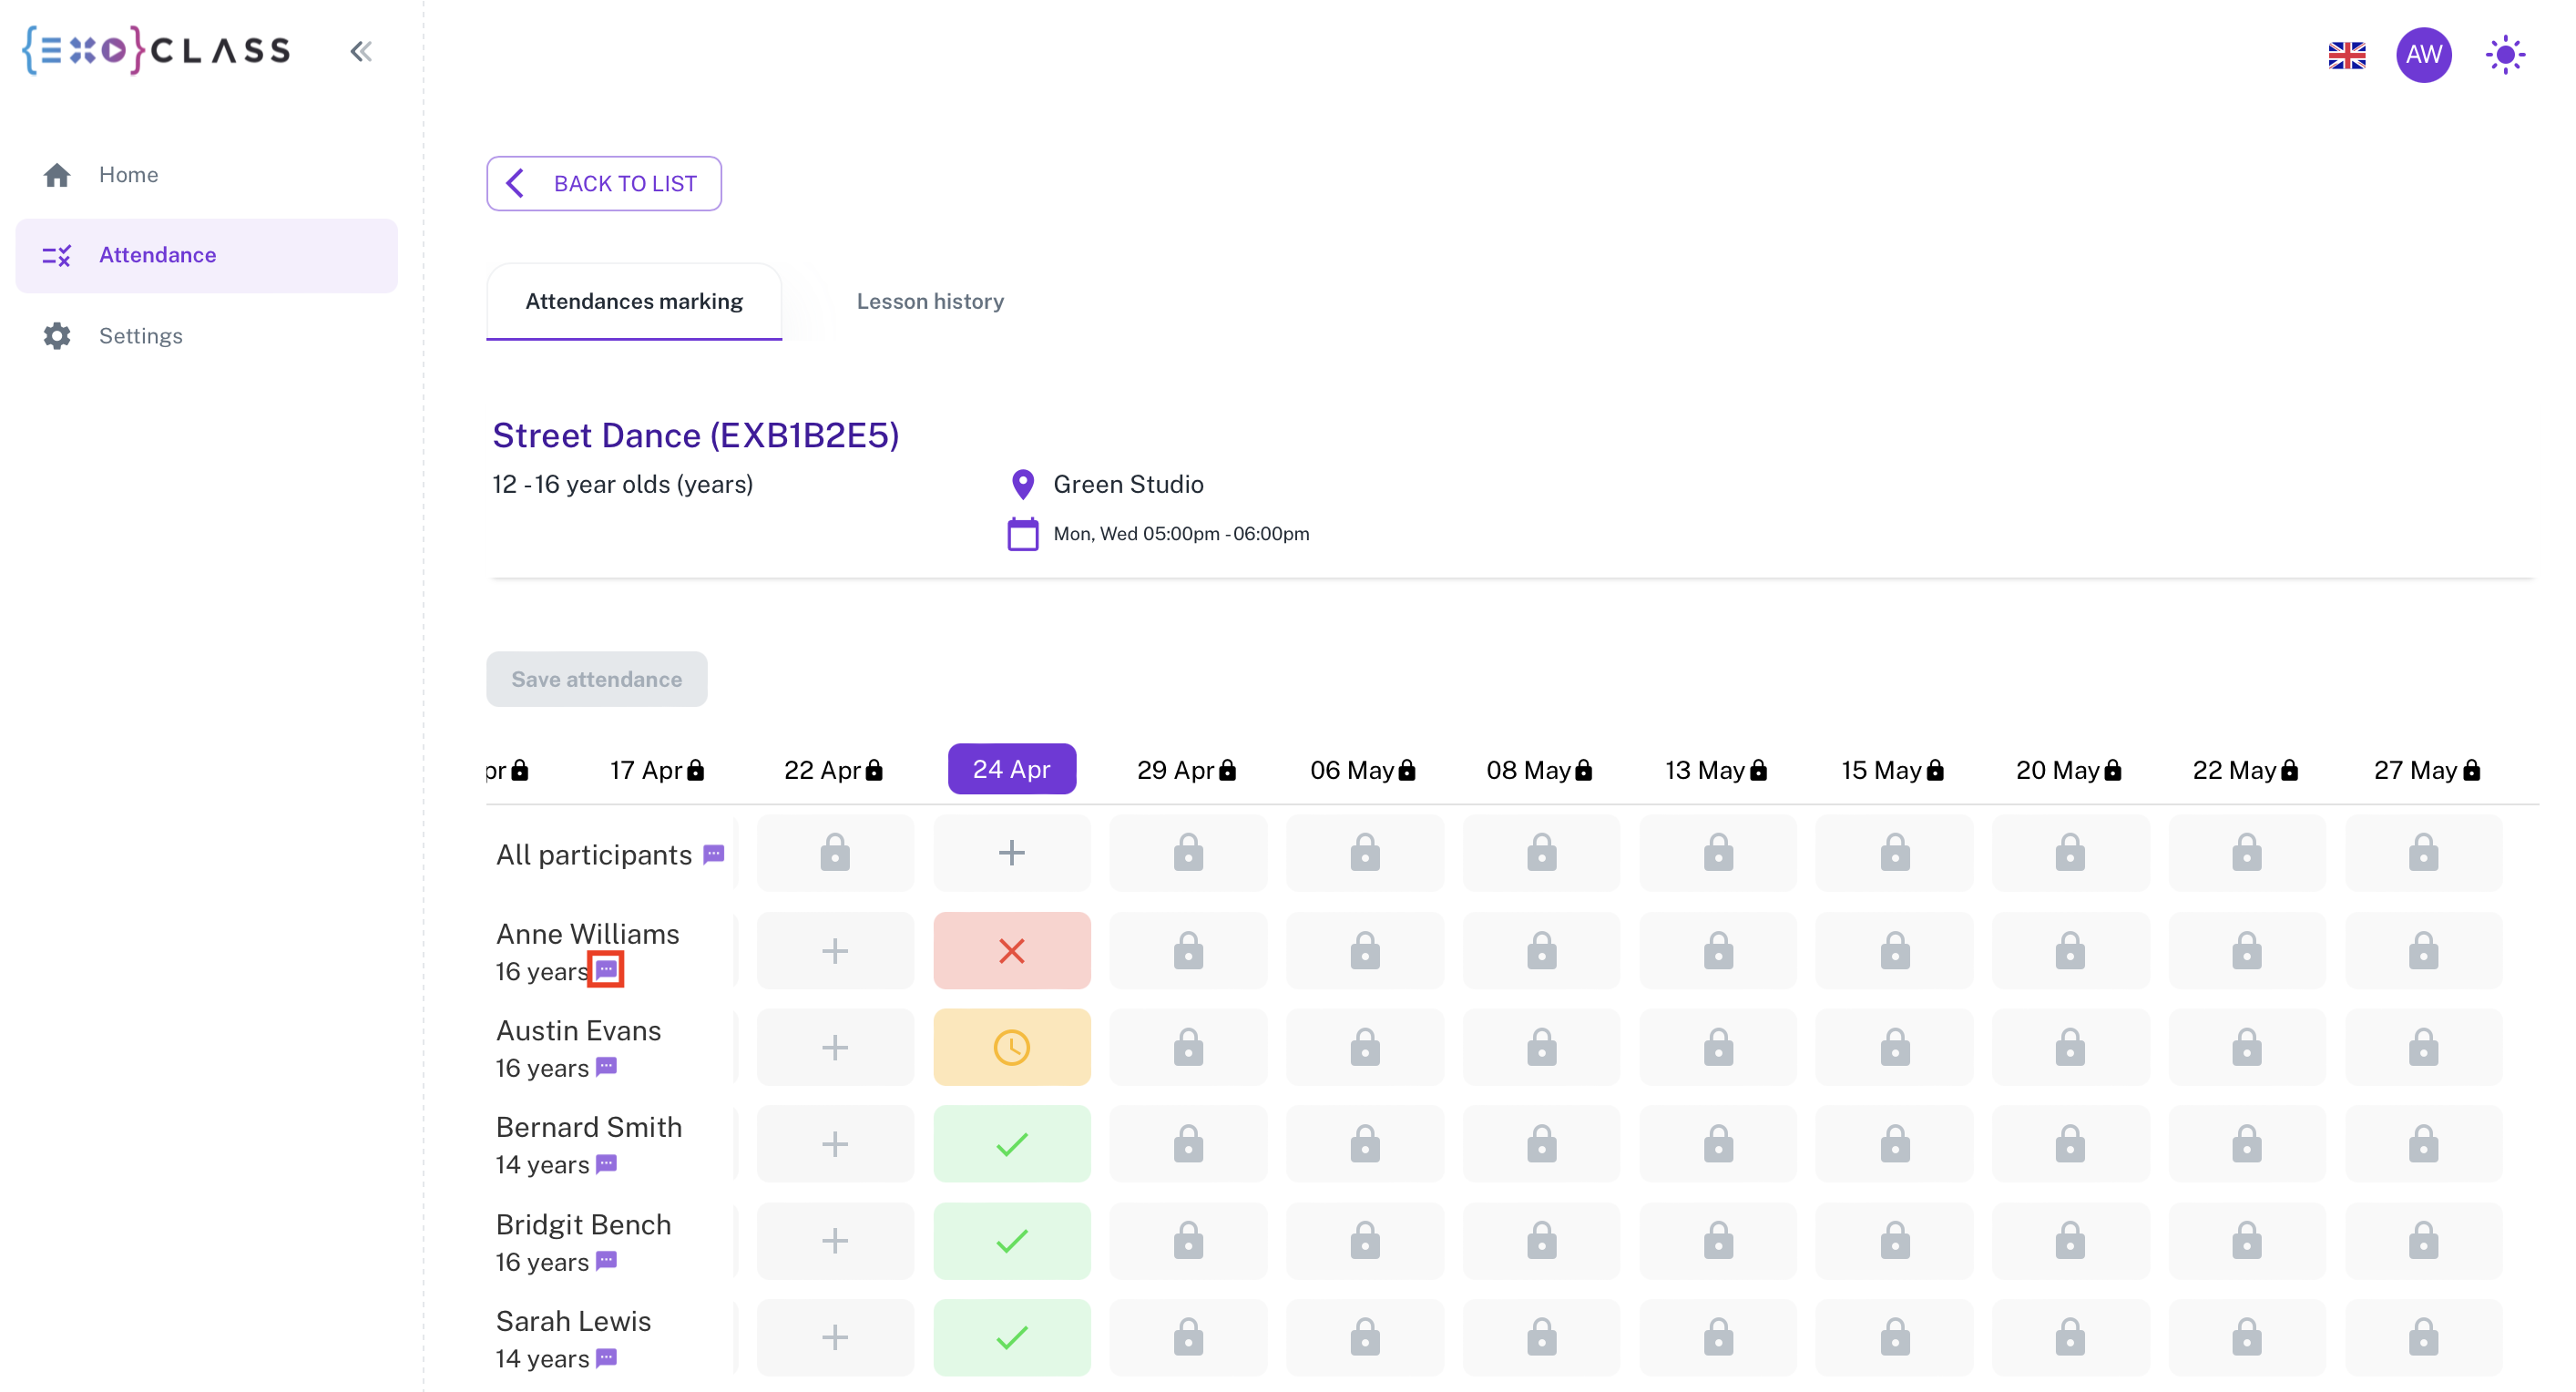
If necessary, you can leave a comment next to the student’s name, which will be visible to all teachers and administrators in the group. To do this, click on the conversation icon next to the student’s name, enter the desired text and save.
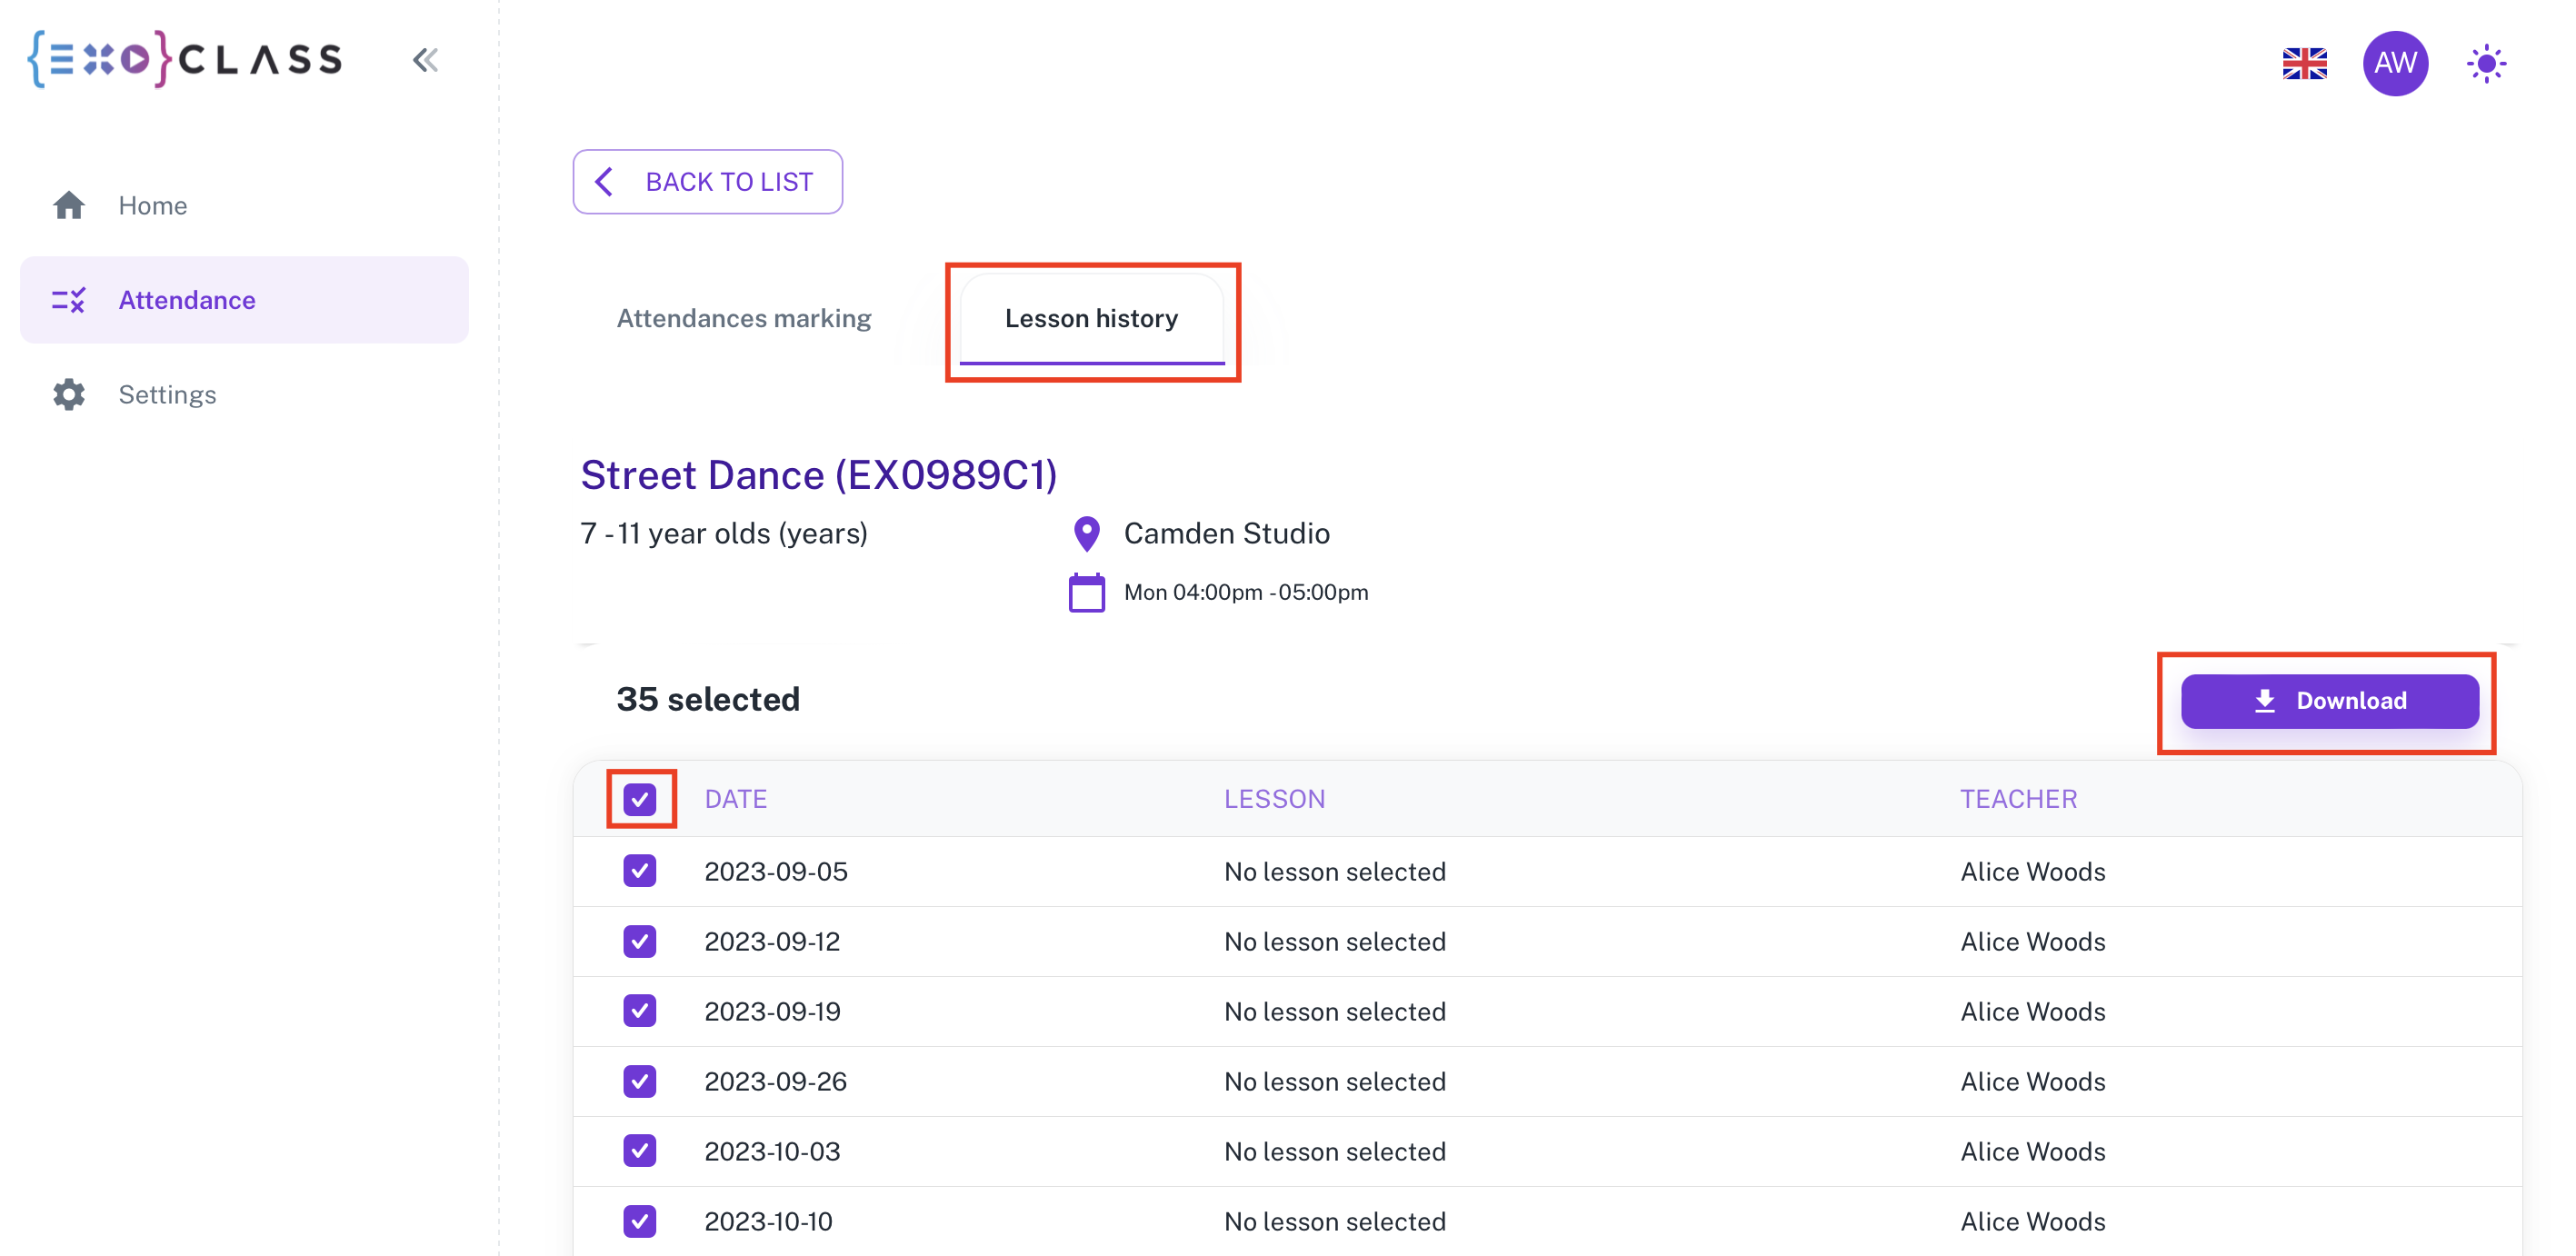
If your organisation uses class themes, you can download the content of the classes from the selected period under “Lesson history”. To do this, tick the desired dates, click the “Download” button at the top right corner of the table, and select your preferred file format.
Now that you know how to use Exoclass, you can take full advantage of its features for studio attendance tracking and teacher profile management. By combining tools for lesson history, group organization, and attendance tracking, Exoclass helps studios and after-school clubs focus on delivering quality education.

Q: How does Exoclass simplify studio attendance tracking?
A: Exoclass offers an intuitive studio admin system where teachers can mark attendance for individual students or entire groups with just a few clicks. The system also provides options for bulk adjustments and generates attendance reports for easier record-keeping and billing.
Q: Can Exoclass be used as teacher management software?
A: Yes, Exoclass functions as comprehensive teacher management software, allowing administrators to track teacher schedules, workload, and performance. Teachers can also manage their assigned groups, mark attendance, and access lesson history through their accounts.
Q: Is Exoclass suitable for after-school clubs?
A: Absolutely. Exoclass is an excellent club management system that enables after-school clubs to track attendance, manage student registrations, and generate reports for different groups and activities.
Q: How does Exoclass help manage students?
A: Our studio admin system serves as powerful student management software, centralizing student information, attendance records, and payment statuses. It also simplifies processes like moving students between groups or adjusting subscription types.
Q: Can parents or guardians access student attendance records?
A: Yes, through the Exoclass client portal, parents and guardians can view their children’s attendance records, group schedules, and payment statuses, enhancing transparency and communication.
